High Expectations and How to Avoid Them

On Monday morning, Derek decided he would become a better person by Thursday.

Not “gradually, over the course of a fulfilling life” better. Thursday. He had a plan: wake at 5 a.m., meditate, run 10k, learn conversational Mandarin during breakfast, read half a biography of someone disciplined and dead, and arrive at work so radiant with self-improvement that his manager would weep and promote him on the spot, possibly into a role that didn’t exist yet, created specifically to contain his new energy.

By 5:04 a.m. Monday, Derek was lying face-down on the bedroom floor, having achieved the meditation portion of his plan purely by accident, in the sense that unconsciousness is a kind of stillness. He woke at 7:40, missed the run, ate the biography, read the breakfast, and arrived at work having learned exactly one word of Mandarin, which he was fairly sure meant either “hello” or “catastrophe,” and which he used interchangeably for the rest of the week.

This is the trouble with high expectations: they are, structurally, small suicide pacts you make with the version of yourself who existed for about ninety seconds on a Sunday night, drunk on optimism and a slightly-too-inspiring YouTube video. That person had big plans. That person is never around for the follow-through. That person, frankly, should be legally barred from making commitments on your behalf, the way you wouldn’t let a toddler sign a mortgage.

Derek’s therapist — a woman named Priya who had the calm, unblinking patience of someone who has heard “I’m going to fix my entire life by Thursday” roughly four thousand times — suggested he try something called “realistic goal-setting.”

“What if,” she said, “instead of becoming a fundamentally new person, you just… did the laundry.”

Derek considered this an insult at first. Then, slowly, a kind of horrifying relief.

He tried it. Monday’s goal was: wash one load of laundry. Just the one. He did it. He felt a small, stupid glow of accomplishment, the kind you’re supposed to feel after building an orphanage, not after pressing a button on a machine. But there it was. He’d done the thing he said he’d do. It was, structurally, the first promise he’d kept to himself since roughly 2019.

Tuesday’s goal: fold the laundry from Monday. He did not fold the laundry from Monday. He is, after all, only human, and also lazy, and the two are not unrelated. But he did walk past the laundry basket and think, “I see you,” which Priya later described as “progress” and which Derek privately filed under “delusion, but a comforting one.”

The trick, he began to understand, wasn’t lowering his standards out of despair — it was lowering them out of strategy, the way a general doesn’t march the whole army off a cliff just because the map said the cliff looked achievable from a certain angle after four beers. You don’t abandon ambition. You just stop asking it to also do cardio.

By the end of the month, Derek had not learned Mandarin. He had not read the rest of the biography — the dead disciplined man remained, as far as Derek was concerned, disciplined right up until the last chapter, which Derek assumed ended well, statistically, for someone with a whole biography written about them. He had not been promoted into a job that doesn’t exist.

But he had done the laundry nine times. He had gone for four short, unglamorous walks that he did not film or post about. He had, once, made it through an entire Tuesday without comparing himself to a stranger on the internet who appeared to run marathons purely for fun and photographed all of it in flattering lighting, which Derek now understood was less “inspiration” and more “psychological warfare with a ring light.”

He still had big dreams. He simply stopped issuing them with deadlines set by his most unreliable and overcaffeinated self. He started asking, each morning, not “what would make today extraordinary” but “what is the smallest true thing I could actually finish,” which is a less thrilling question, and also the only one that has ever, in the history of human beings, actually gotten anything done.

Derek did eventually get that promotion, as it happens — eight months later, for reasons involving competence and consistency rather than a single radiant Thursday. Nobody wept. There was a very ordinary meeting. Someone brought slightly stale croissants.

It was, he thought, exactly as unremarkable as he’d hoped. Which, it turned out, was the whole point.
Raspberry PI projects

As I keep bumping into interesting projects from people for Raspberry PI boards, I though it would be a great idea to share my current collection with others.

PI KVM

Ever wanted to control a computer remotely the same way as HP iLO or Dell iDRAC? You can now with the PI Raspberry and the PI KVM software.

https://pikvm.org/

RA SCSI

This a combination of a Raspberry PI and a daughterboard to create a CDROM/harddisk SCSI emulator. Very handy when running old computer equipment or hardware samplers.

https://github.com/akuker/RASCSI/wiki

RASPLEX

Plex Media Server client for the Raspberry PI. Convenient when you have a non smart TV but still want to watch your Plex content.

https://www.rasplex.com/

PI VPN

PI VPN server to reach your home network when away.

https://www.pivpn.io/

Restreamer

Very handy restreamer software when you want to stream video to YouTube but your equipment doesn’t support it.

https://datarhei.github.io/restreamer/

OSMC

Open Source Media Center. Pretty good mediaplayer for the Raspberry PI.

https://osmc.tv/download/

Volumio

Open Source audio player which let you create you and others your own playlists

https://volumio.org/

Having fun with AK.SYS

The fun/challenge working with old music equipment, is that the software and drivers required for them are also aging quite a bit. This also means it’s getting harder and harder to run older software on newer OS platforms.
Akai back in the day, developed the AK.SYS software to easily control any S5000/S6000 samplers remotely if they were equiped with the required USB card.

To be able to keep using this software, there are at least 2 possible options:
1. Use older hardware (old laptop) to run the software
2. Use a hypervisor (Virtual Box / VMware Fusion / Parallels) to emulate older hardware within a virtual machine.

Testing environment

MacPro 2009 (flashed to 5.1)
OS: Mojave 10.14.6
Vmware Fusion: 11.5.7
AK.SYS: 2.53

Windows versions

General installation notes
– Only 32 bit versions of Windows will work with AK.SYS
– Install the OS and the VMware Tools
– Present the AKAI USB device to the Virtual Machine
– Install the Akai USB driver
– Install the aksys253.exe
– Install the S56ak253.exe

Windows 98
Windows 98 basically should work but the VMware Fusion drivers for 98 leave half the devices not properly detected. As such, I would recommend against using Windows 98.

Windows ME
I personally consider Windows ME an unstable piece of crap which should never have seen the light of day.

Windows XP 32 bit
By most people considered to be the best choice for running AK.SYS

Windows Vista 32 bit
Although Service Pack 2 did at some point make Vista sort of usable, I’m not a fan of this OS.

Windows 7 32 bit
I would normally consider Windows 7 to be stable but I did managed to get a blue screen when the AK.SYS driver was misbehaving.

OS X versions

As the AK.SYS software was developed for the PowerPC platform, only OS X versions with Rosetta support (which lets you run PowerPC software on Intel) will work. This basically means that the latest version which will support AK.SYS is Snow Leopard 10.6.3. However, due to legal limitations, VMware Fusion will not allow you to run Snow Leopard guest or any previous OS X version.

This will leave you with 3 possible options:
1.Use Snow Leopard Server
2.Use VirtualBox instead
3.Use a “workaround” for the EFI file used by the virtual machine.

Akai S1000 – joining the SCSI club at last!

As the S1000 was the only one of my samplers which hadn’t been given the SCSI2SD treatment yet, it was time to rectify this. My S1000 already had the SCSI controller installed so should be easy enough, right?

Well…turned out it was a bit more work then I thought so for anyone with the same plans, here’s what worked for me.

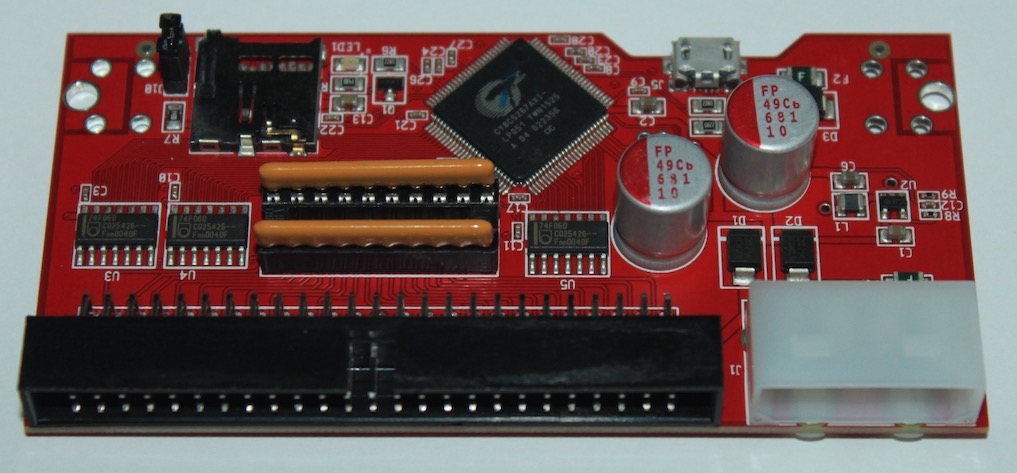
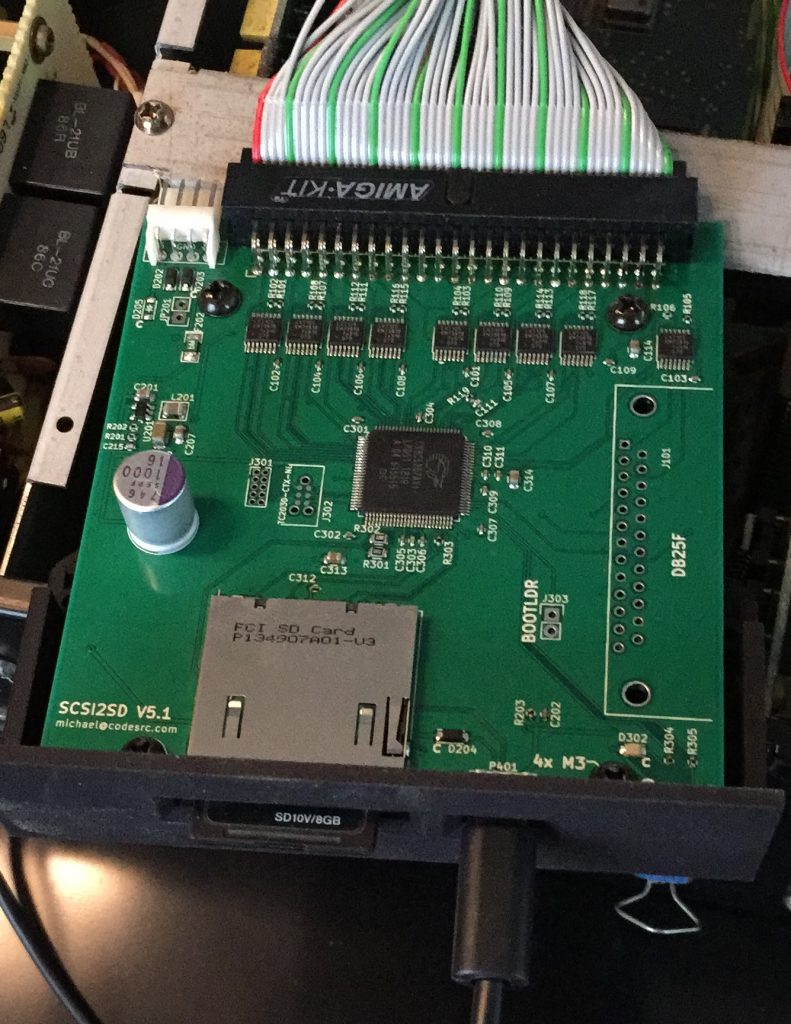
Step 1 – Get an SCSI2SD v5.1 with the floppy disk bracket

SCSI2SD V5.1

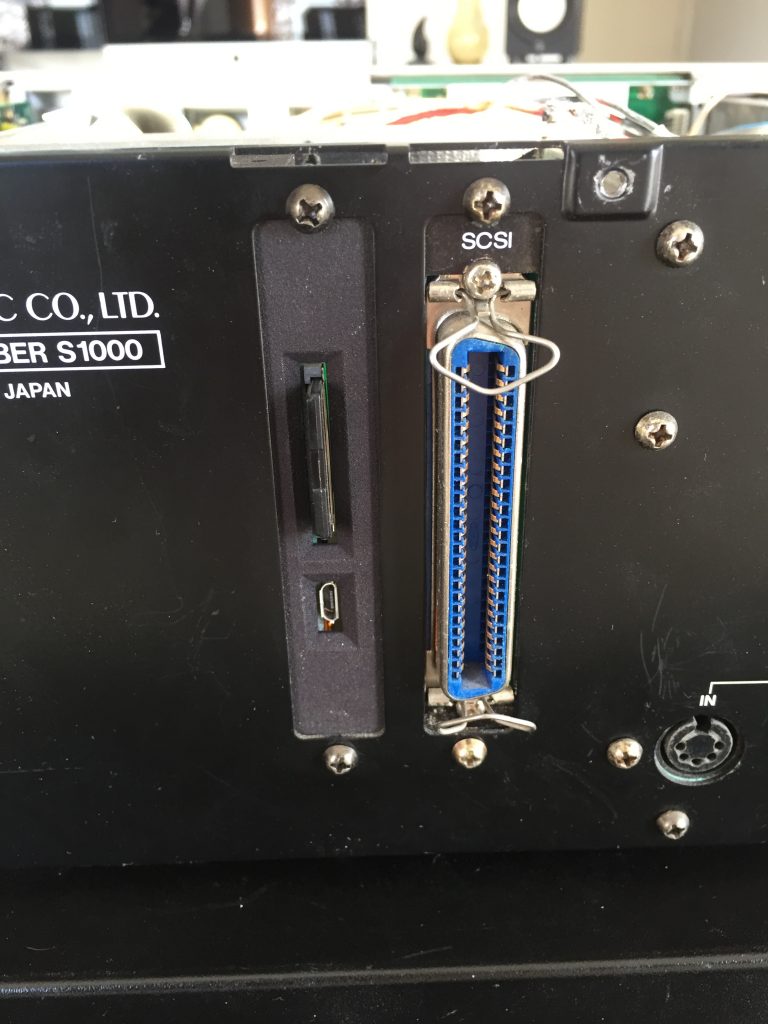
Although I will not mount the SCSI2SD in the place of the current floppy disk (as I still want to be able to load samples of floppy disk), the floppy disk bracket is handy to mount it in place of one of the option cards at the back.

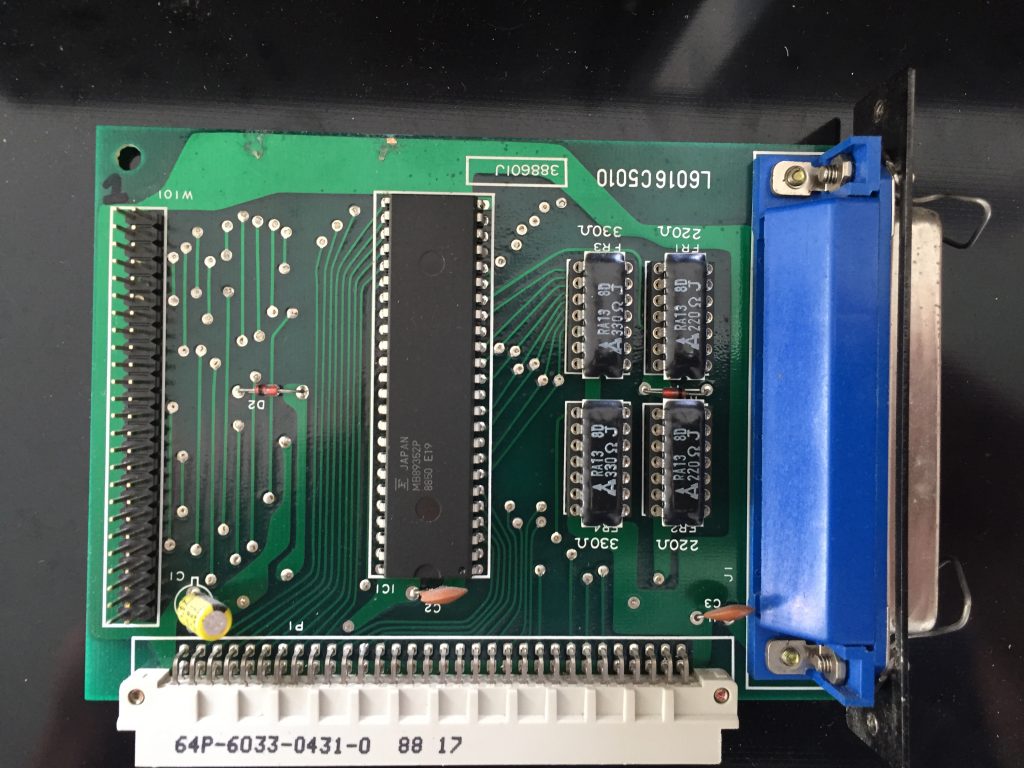
Step 2 – Solder a 50 pin male header on the SCSI controller

Akai SCSI controller board

As the normal S1000 (not the S1000HD) was only meant to have external harddrives connected to it through the Centronics connecter at the back, the controller card doesn’t have the internal connector installed by the factory. Simply get a 50 pin male header and solder it onto the board. The header should be on the same side as the rest of the components. Pin 1 (for cable orientation) is at the top of the board.

Step 3 – Modify the floppy bracket

Using the original metal blanking plate as a template, drill 2 small holes (2.5mm) in the floppy disk bracket. You can then use the original screws to mount the bracket. Don’t over tighten the screws as this is plastic.

SCSI2SD mounted at the back

Step 4 – Modify the metal option card holder

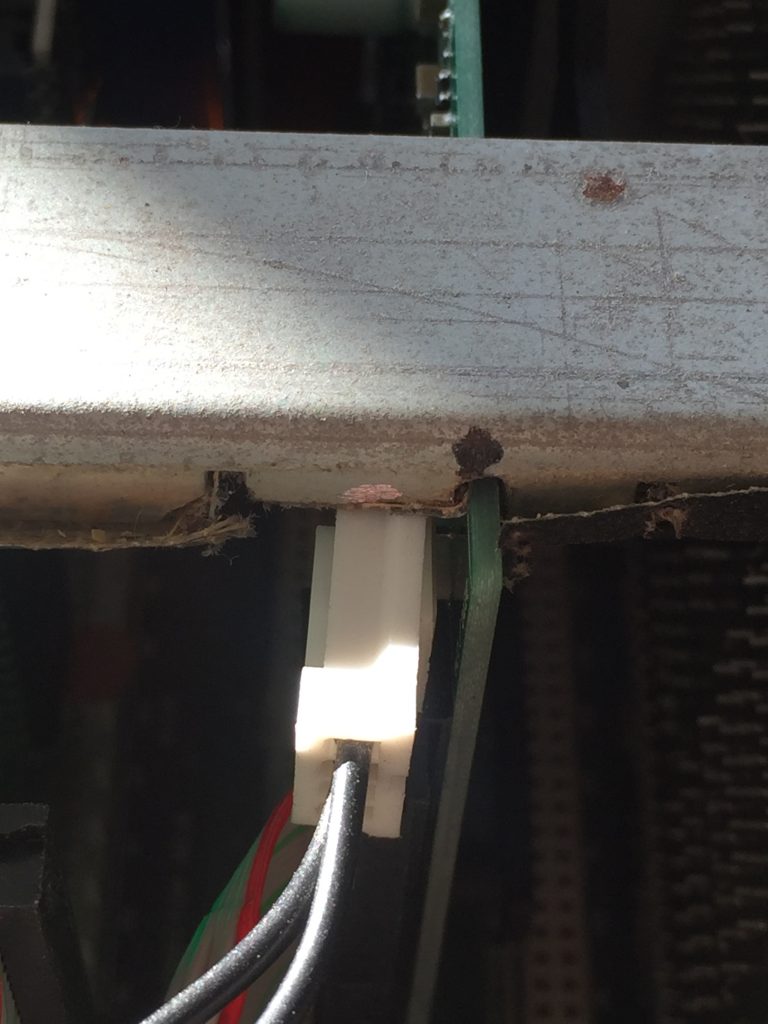
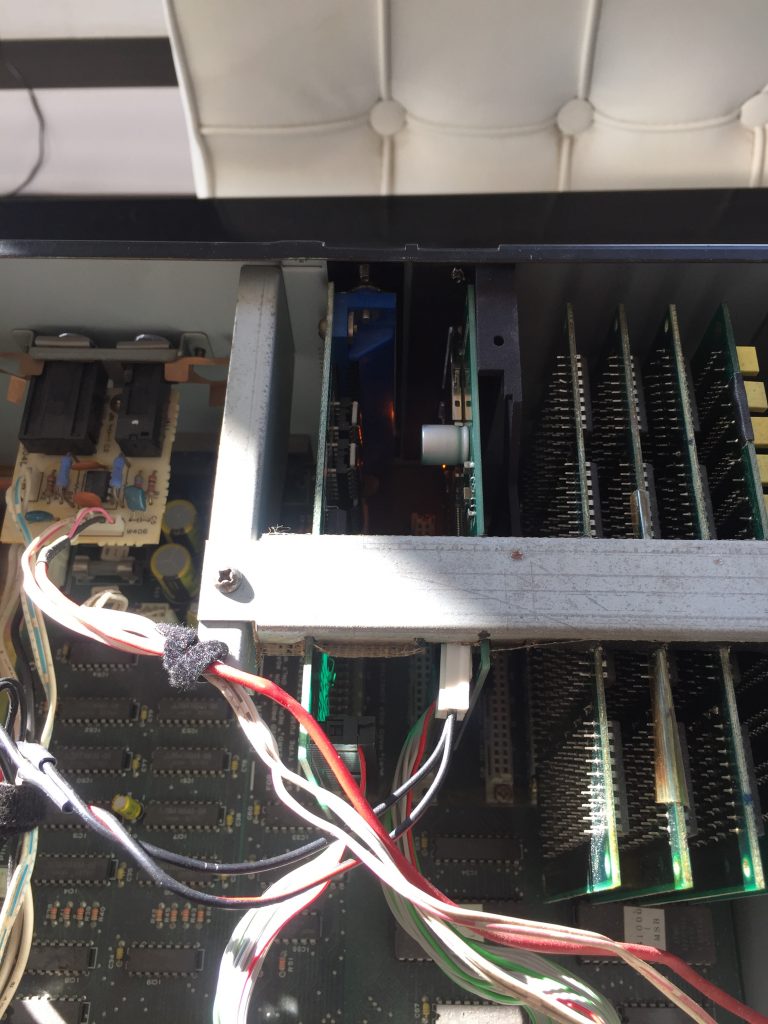
The metal bracket on top of the option cards prevents the cards from wiggling too much in their connectors in the motherboard. I had to Dremel extra notches in the bracket to hold the SCSI2SD card. As the power connector of the SCSI2SD card is at the edge of the PCB, I had to remove some extra metal on that side as well.

Step 5 – Install the SCSI cable

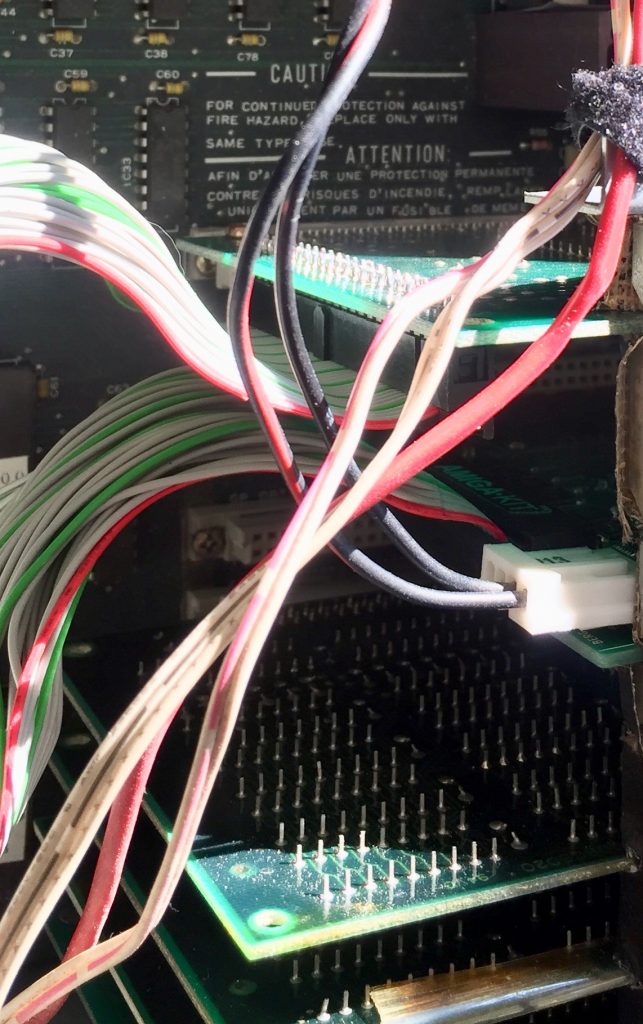
Get a suitable 50 pin SCSI cable and simple connect it to the SCSI controller board with pin 1 (marked with red stripe) pointing upwards. The other end goes into the SCSI2SD card (the notch on the connector will force the correct orientation).

Step 6 – Power supply for SCSI2SD

I simply cut off a floppy power supply connector from an old PC PSU I had lying around. You can remove the yellow wire from it as we don’t need +12V. You can grab +5V from the main switching power supply as there are no spare connectors on the motherboard which can be used. Use the terminals with the red (+5V) and black (ground) connected to it. ALWAYS measure the voltage before doing this to make sure you have the correct terminals!

Step 7 – Setting up SCSI2SD

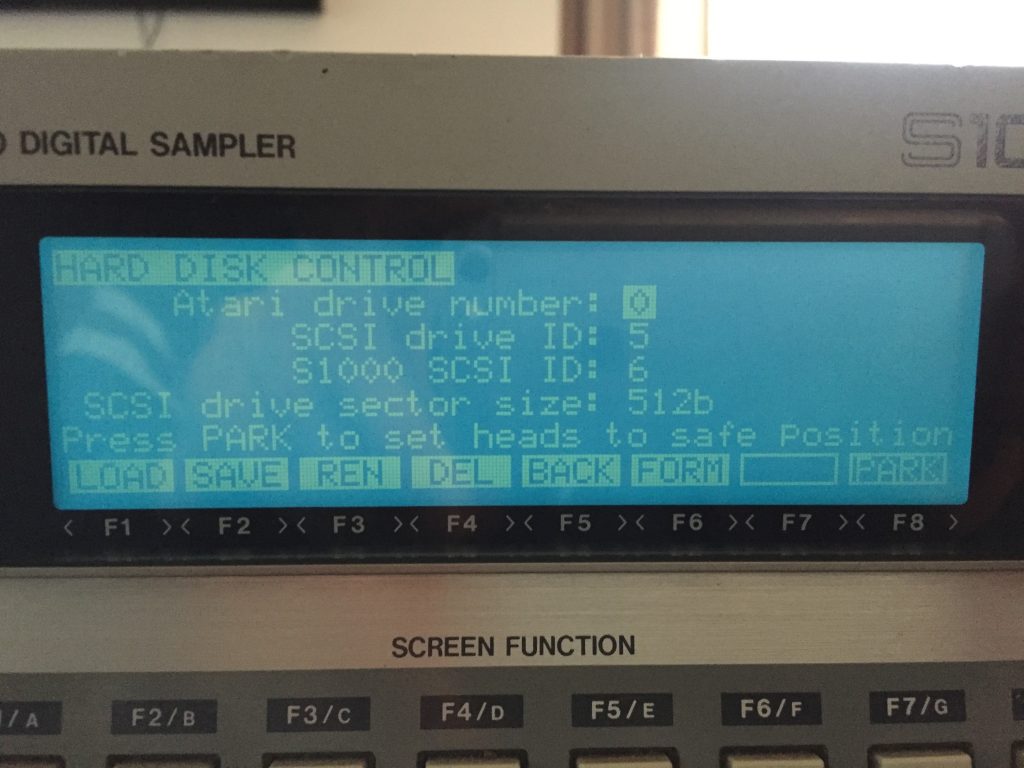
The default settings for the S1000 is that SCSI ID 0 is used for an Atari MegaFile harddisk, ID 5 is used for an optional SCSI harddisk and ID 6 is reserved for the SCSI controller. This can be checked by pressing Disk and then F5.

Akai S1000 default SCSI settings


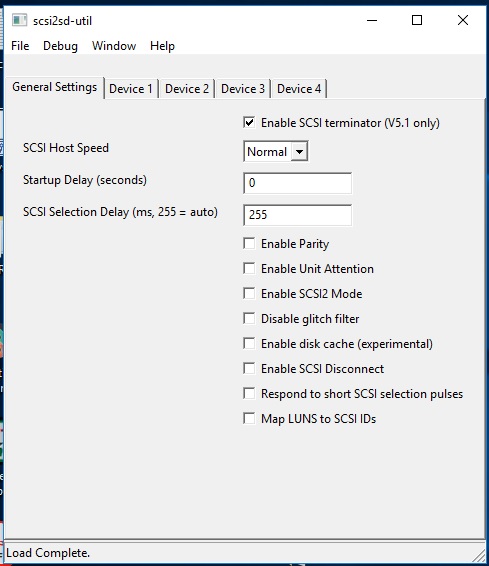
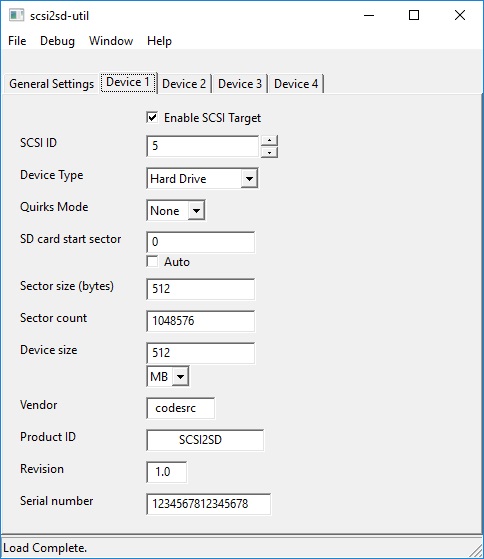
Simply hook up your laptop to the SCSI2SD, start the SCSI2SD utility and configure it with 512 byte sector, 512 MB size and ID 5. Leave the rest of the settings default (make sure termination is enabled).

Step 8 – Formatting time!

  • Power up the S1000
  • Press Disk
  • Press F6 to format
  • Select FORMAT FLOPPY OR HARD DISK : HARD-:
  • Select HARD PARTITIONS size : 60 Mb
  • Press F7
  • Press F8 to confirm
  • Get some tea or coffee 🙂

Note: The partitions are visible as Hard disk A to H

Akai S1000 – phoenix from the ashes

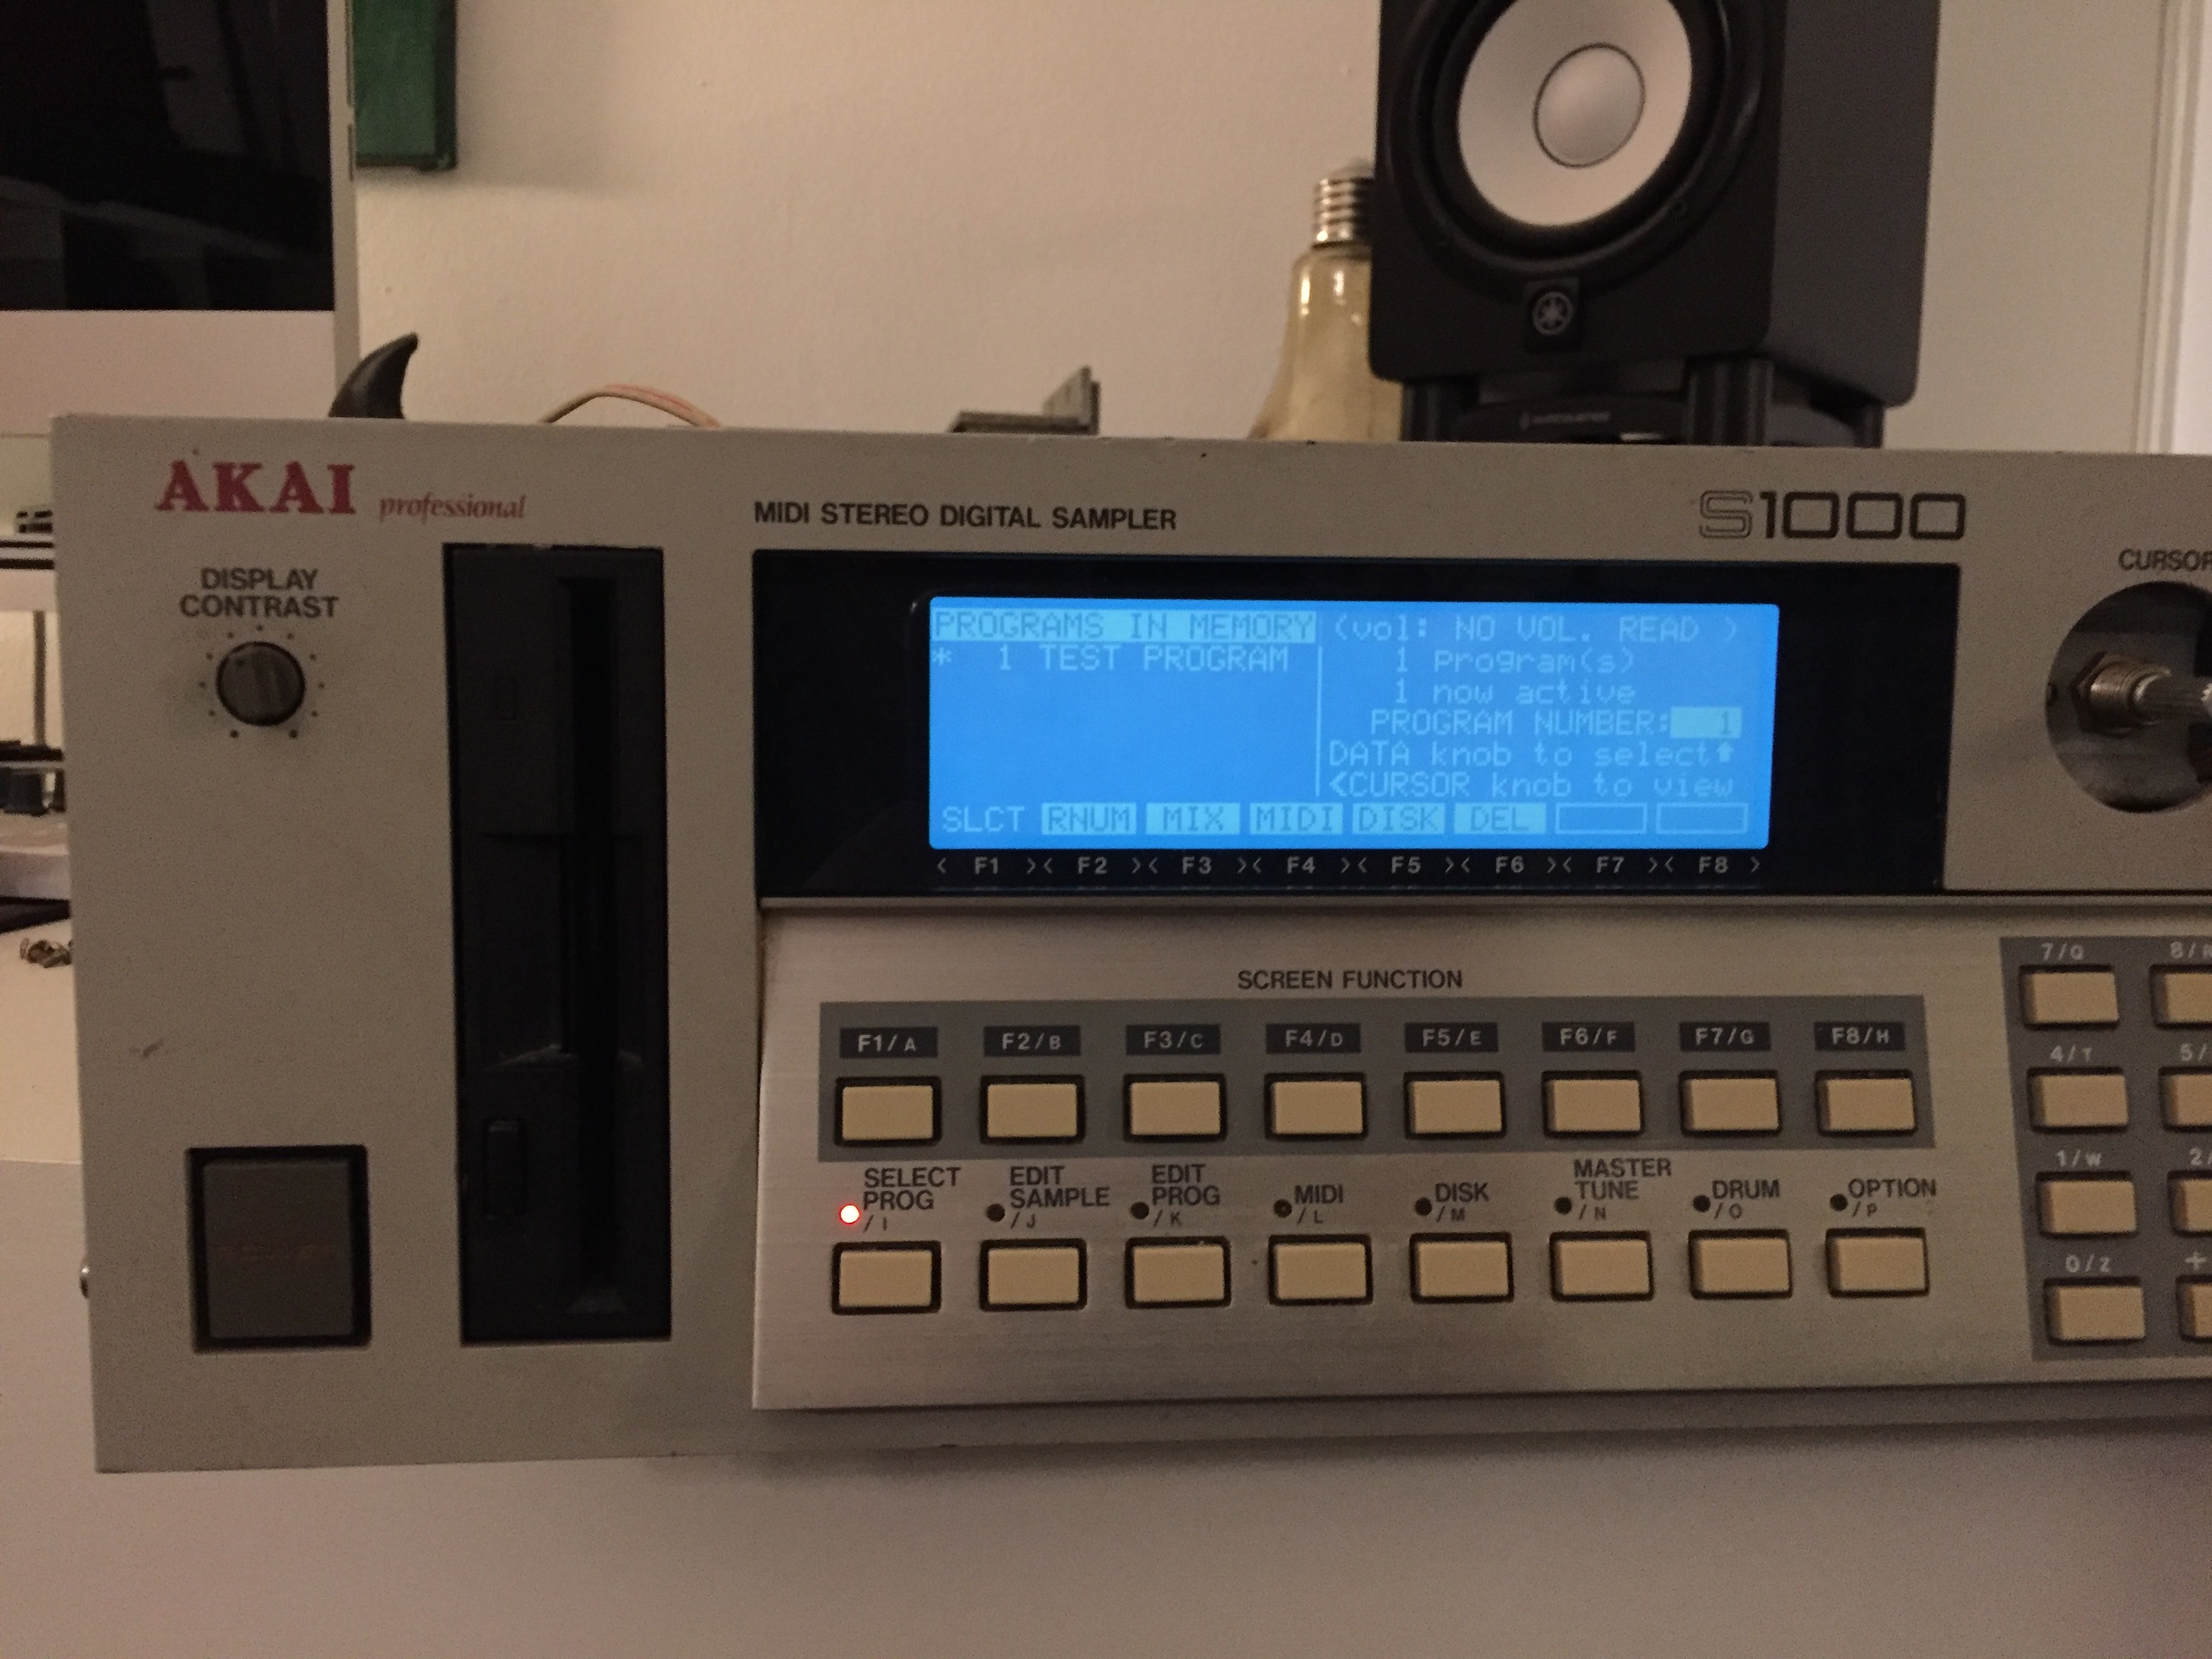
I’m member of a number of Facebook groups for my hobbies including a couple for my Akai sampler. One of the funny things I read at some point in time, was when a guy reported that he “accidentally” bought another sampler 🙂 Well, seems I laughed a bit too soon as I’m now the proud owner of an S1000 I didn’t intend to buy.

This all started with a guy from Portugal who bought a used but defective S1000. In the end, he didn’t have time available to repair it and wanted to get rid of it. At some point he lowered the price to a (for me) interesting level and after some negotiations, we agreed on a total price including shipping with my intention to have a quick look to see if it was repairable, don’t spend too much money on it and otherwise part it out for spares if it became too costly.

The sampler was made ready for shipment (thanks Paulo for arranging this) and after a European tour from Portugal to Spain, Italy and Belgium, finally arrived in The Netherlands at my home.

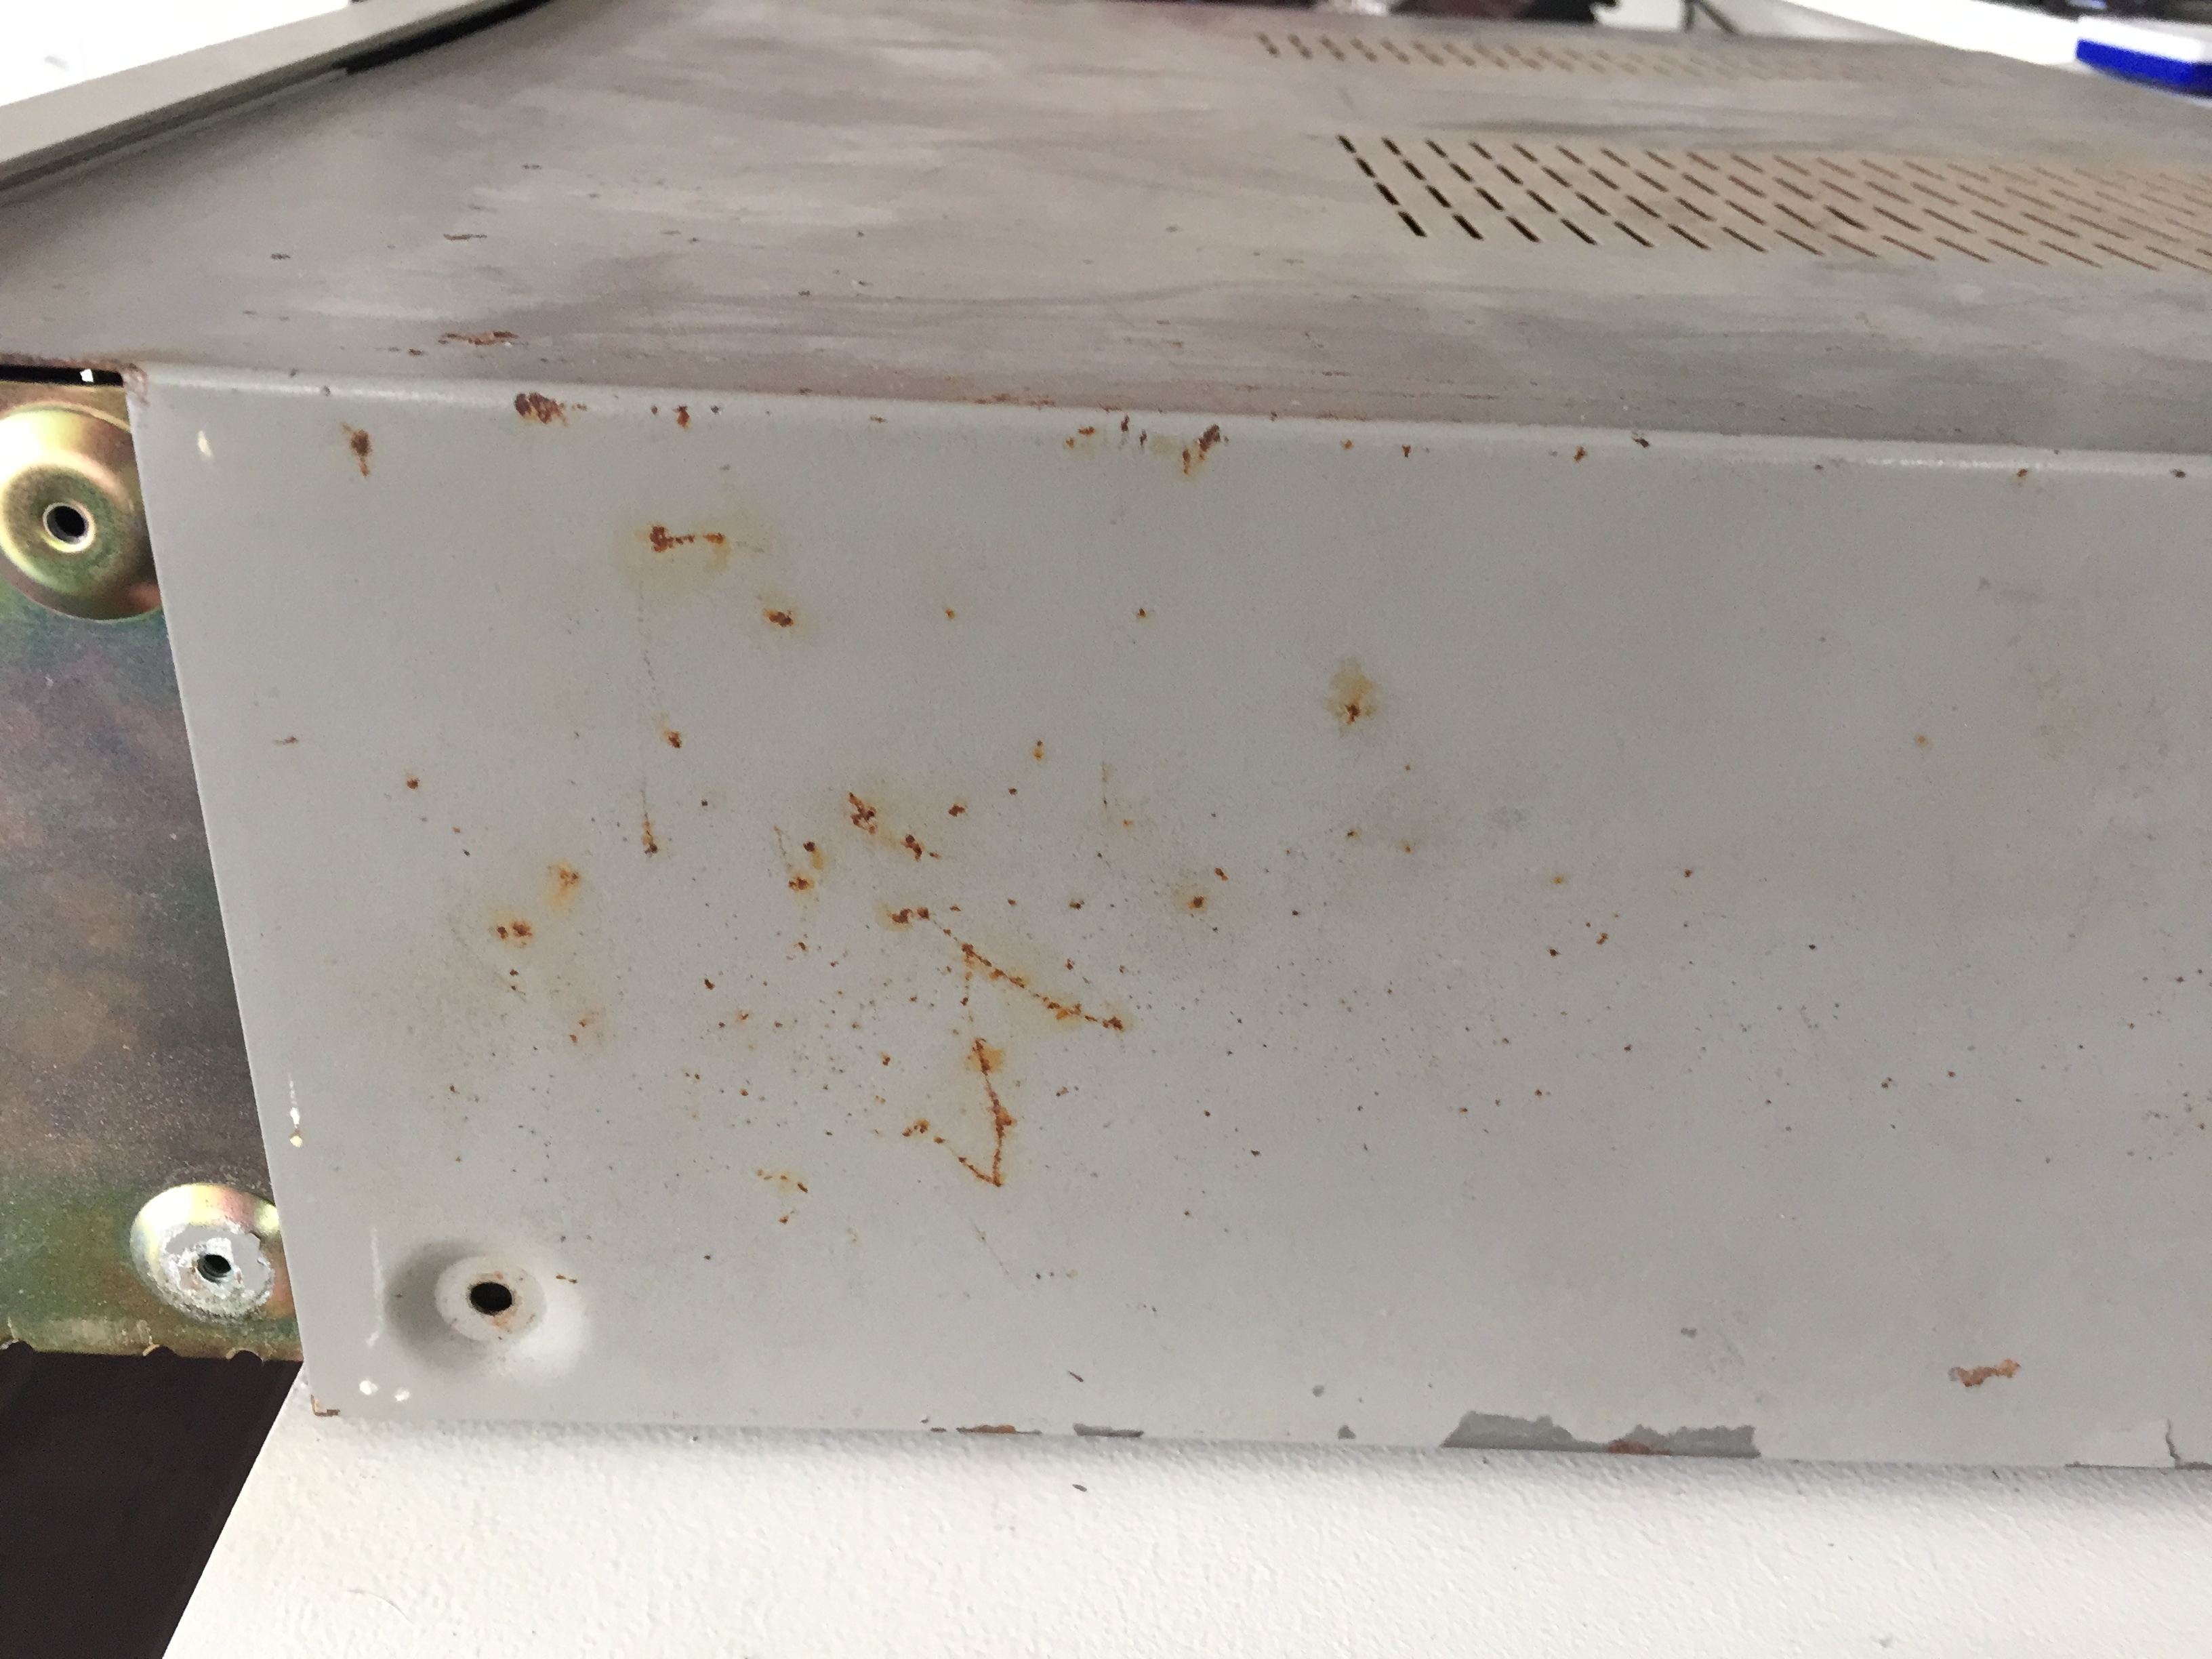
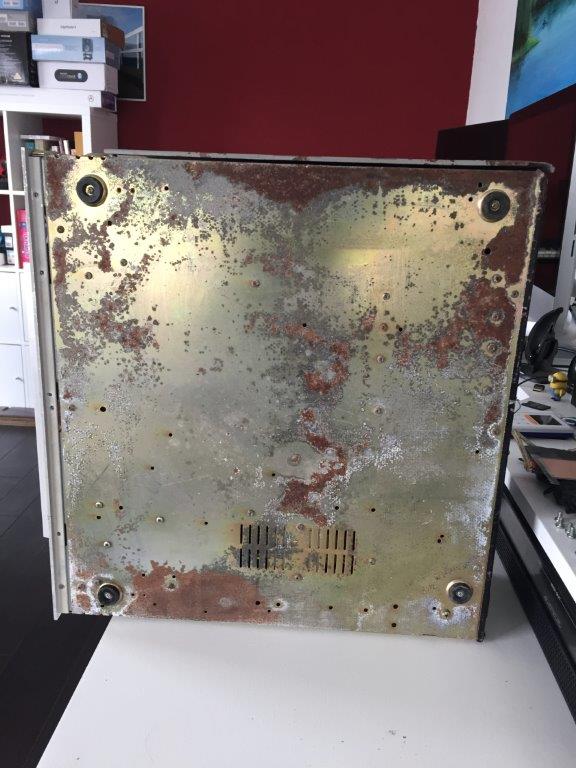
Right, first thing to do was to unwrap it and to do a physical inspection. The outside case was not in a great condition and looks like someone had kept it in a humid shed.

Bottom with a bit much too patina
Bottom not looking too great either

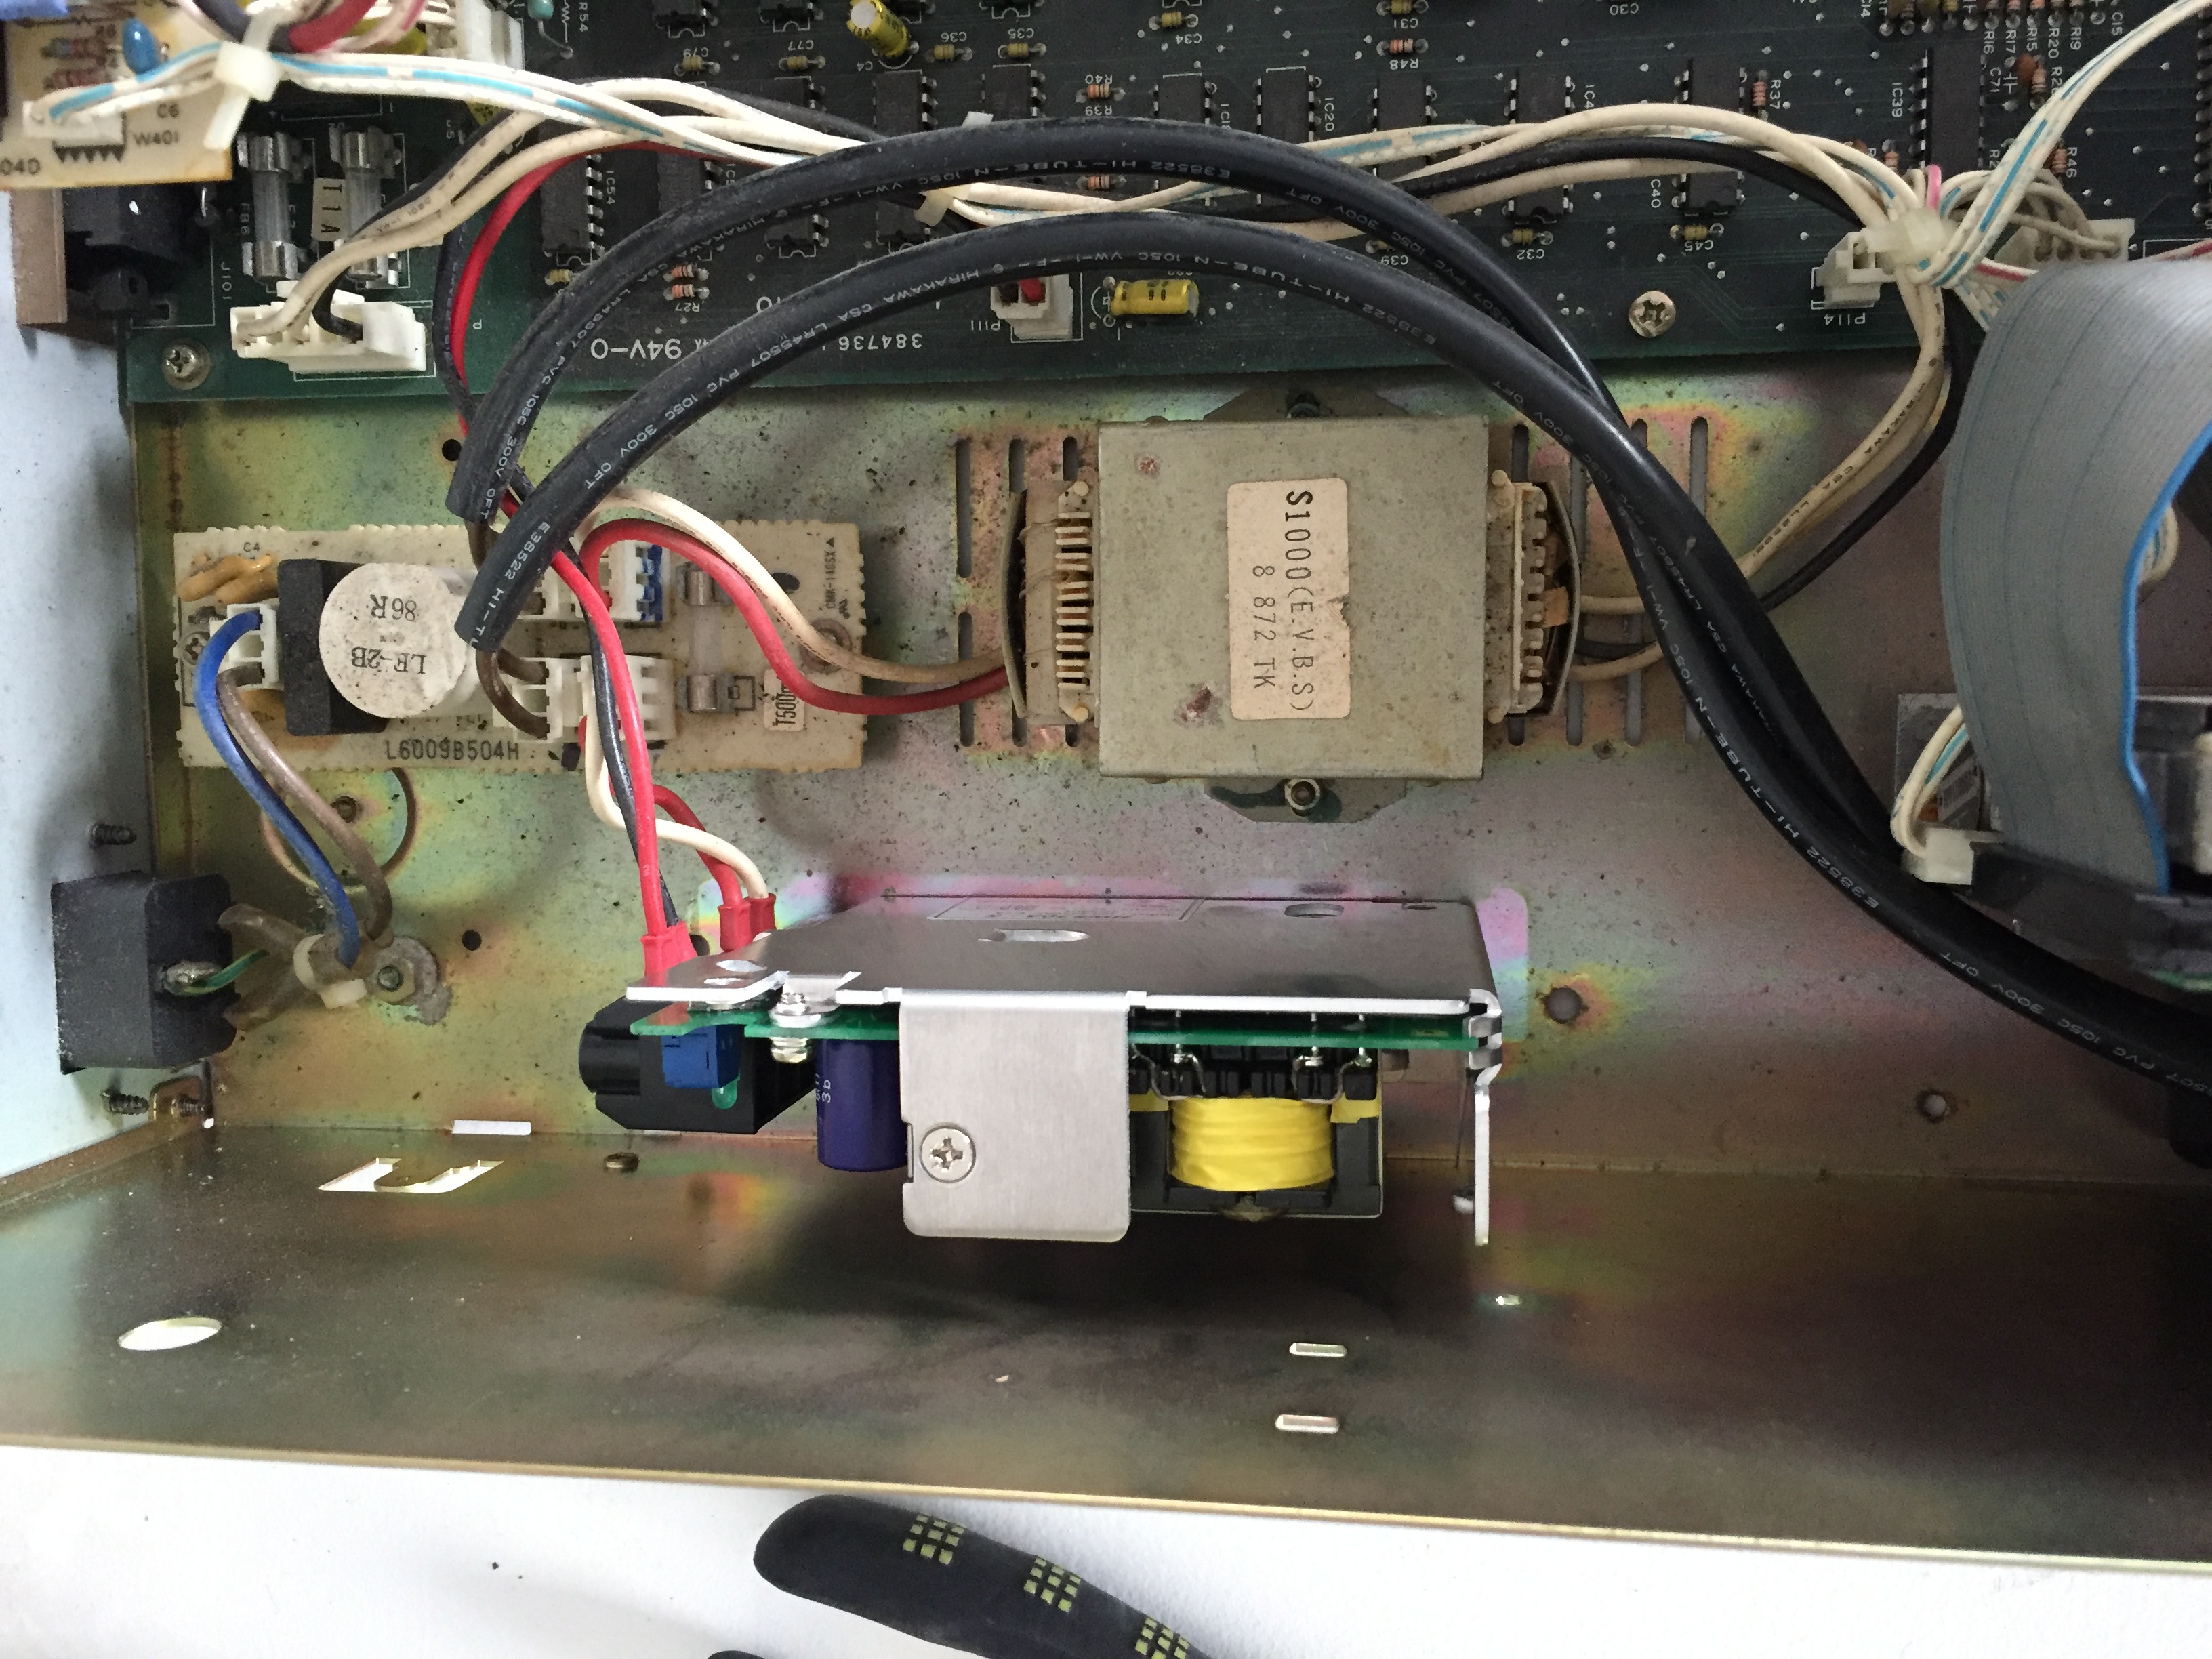
The inside wasn’t too bad with the electronics looking decent. First problem was that the power button was sticking which was easily fixed by disassembling it from the front panel and reassembling it again.
Powered it on, absolutely nothing. Right, time to break out the multi meter. This Akai actually has 2 power supplies with a switching power regulator for 5V and a standard one for the 12V. The 5V supply was dead as a doornail, got my laboratory power supply (big 10A adjustable supply) to see if this was the only issue at this point.

And low and behold…it powered up!

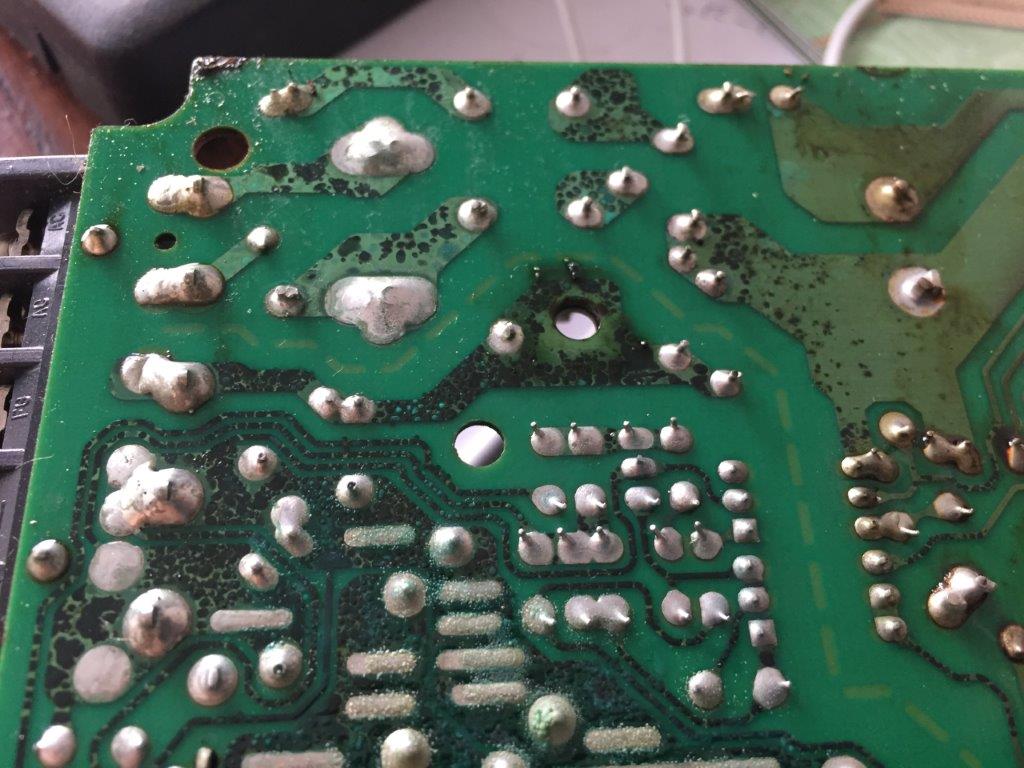
The (known) issue with the PSU was a leaking capacitor which had contaminated the bottom of the PCB. I could have cleaned it and recapped the supply but it looked a bit too degraded for my liking and I chose to replace it with a TDK Lambda HWS-30A-5 PSU. Ordered it, build it in and voila, we had a working sampler again.

Old PCB board corroded by capacitor acid


I could have left the sampler in this (workable) state but I know defects bother me so started to work on the other issues as well. The display backlight was defective and replaced with a new EL foil from midi-rakete.de


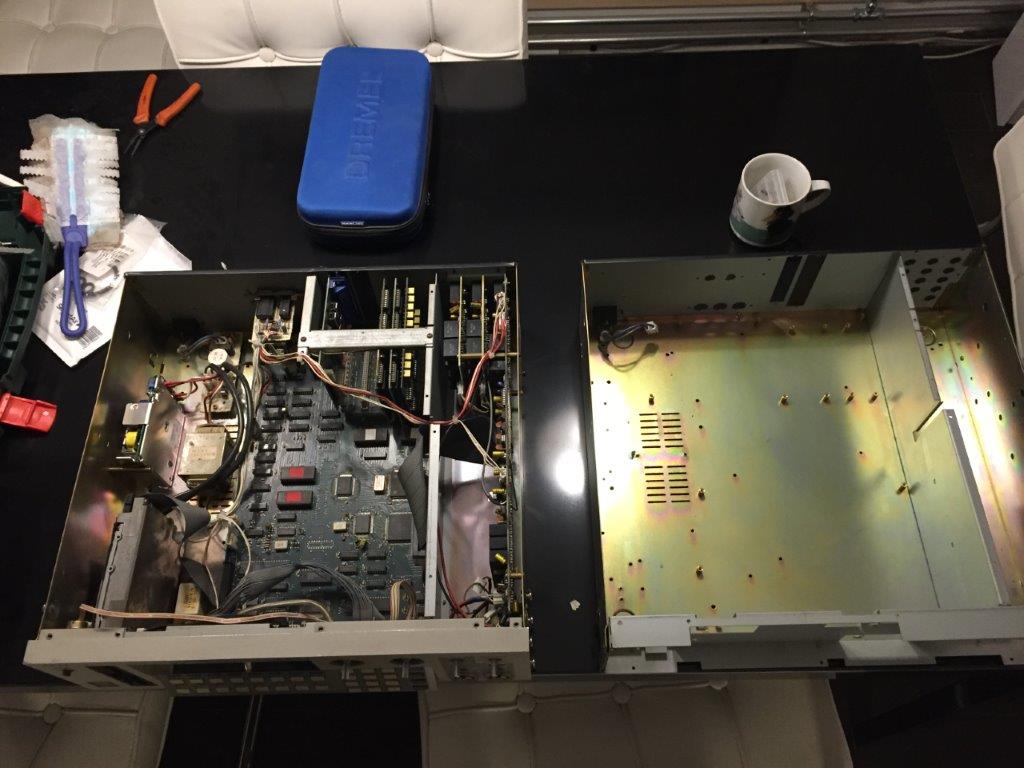
The firmware was also a bit old (version 3.00) and as I was arranging 4.40 eproms, the dutch guy I got these from, also mentioned he had some scrap S1000 cases lying around. So I bought both the eproms and a  used S1000 case from him (thanks, Karel Post). Swapped the eproms and moved all the electronics from the old to the new case (took me some time to do).

Left needs to go to the right…pffff….

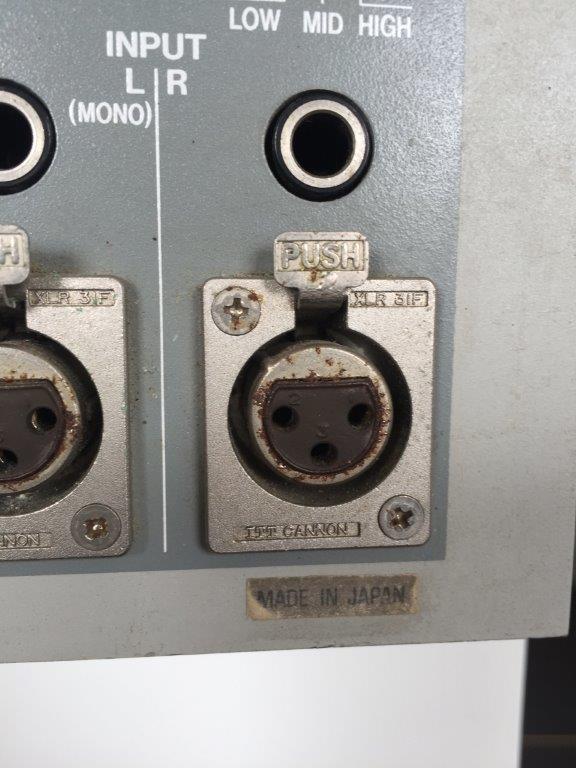
Last little task was to clean up the front input XLR connectors as they were corroded. I did managed to clean them with a Dremel and wirebrush but I might replace them with new connectors if this bothers me too much (ITT Cannon XLR3-31-F77)

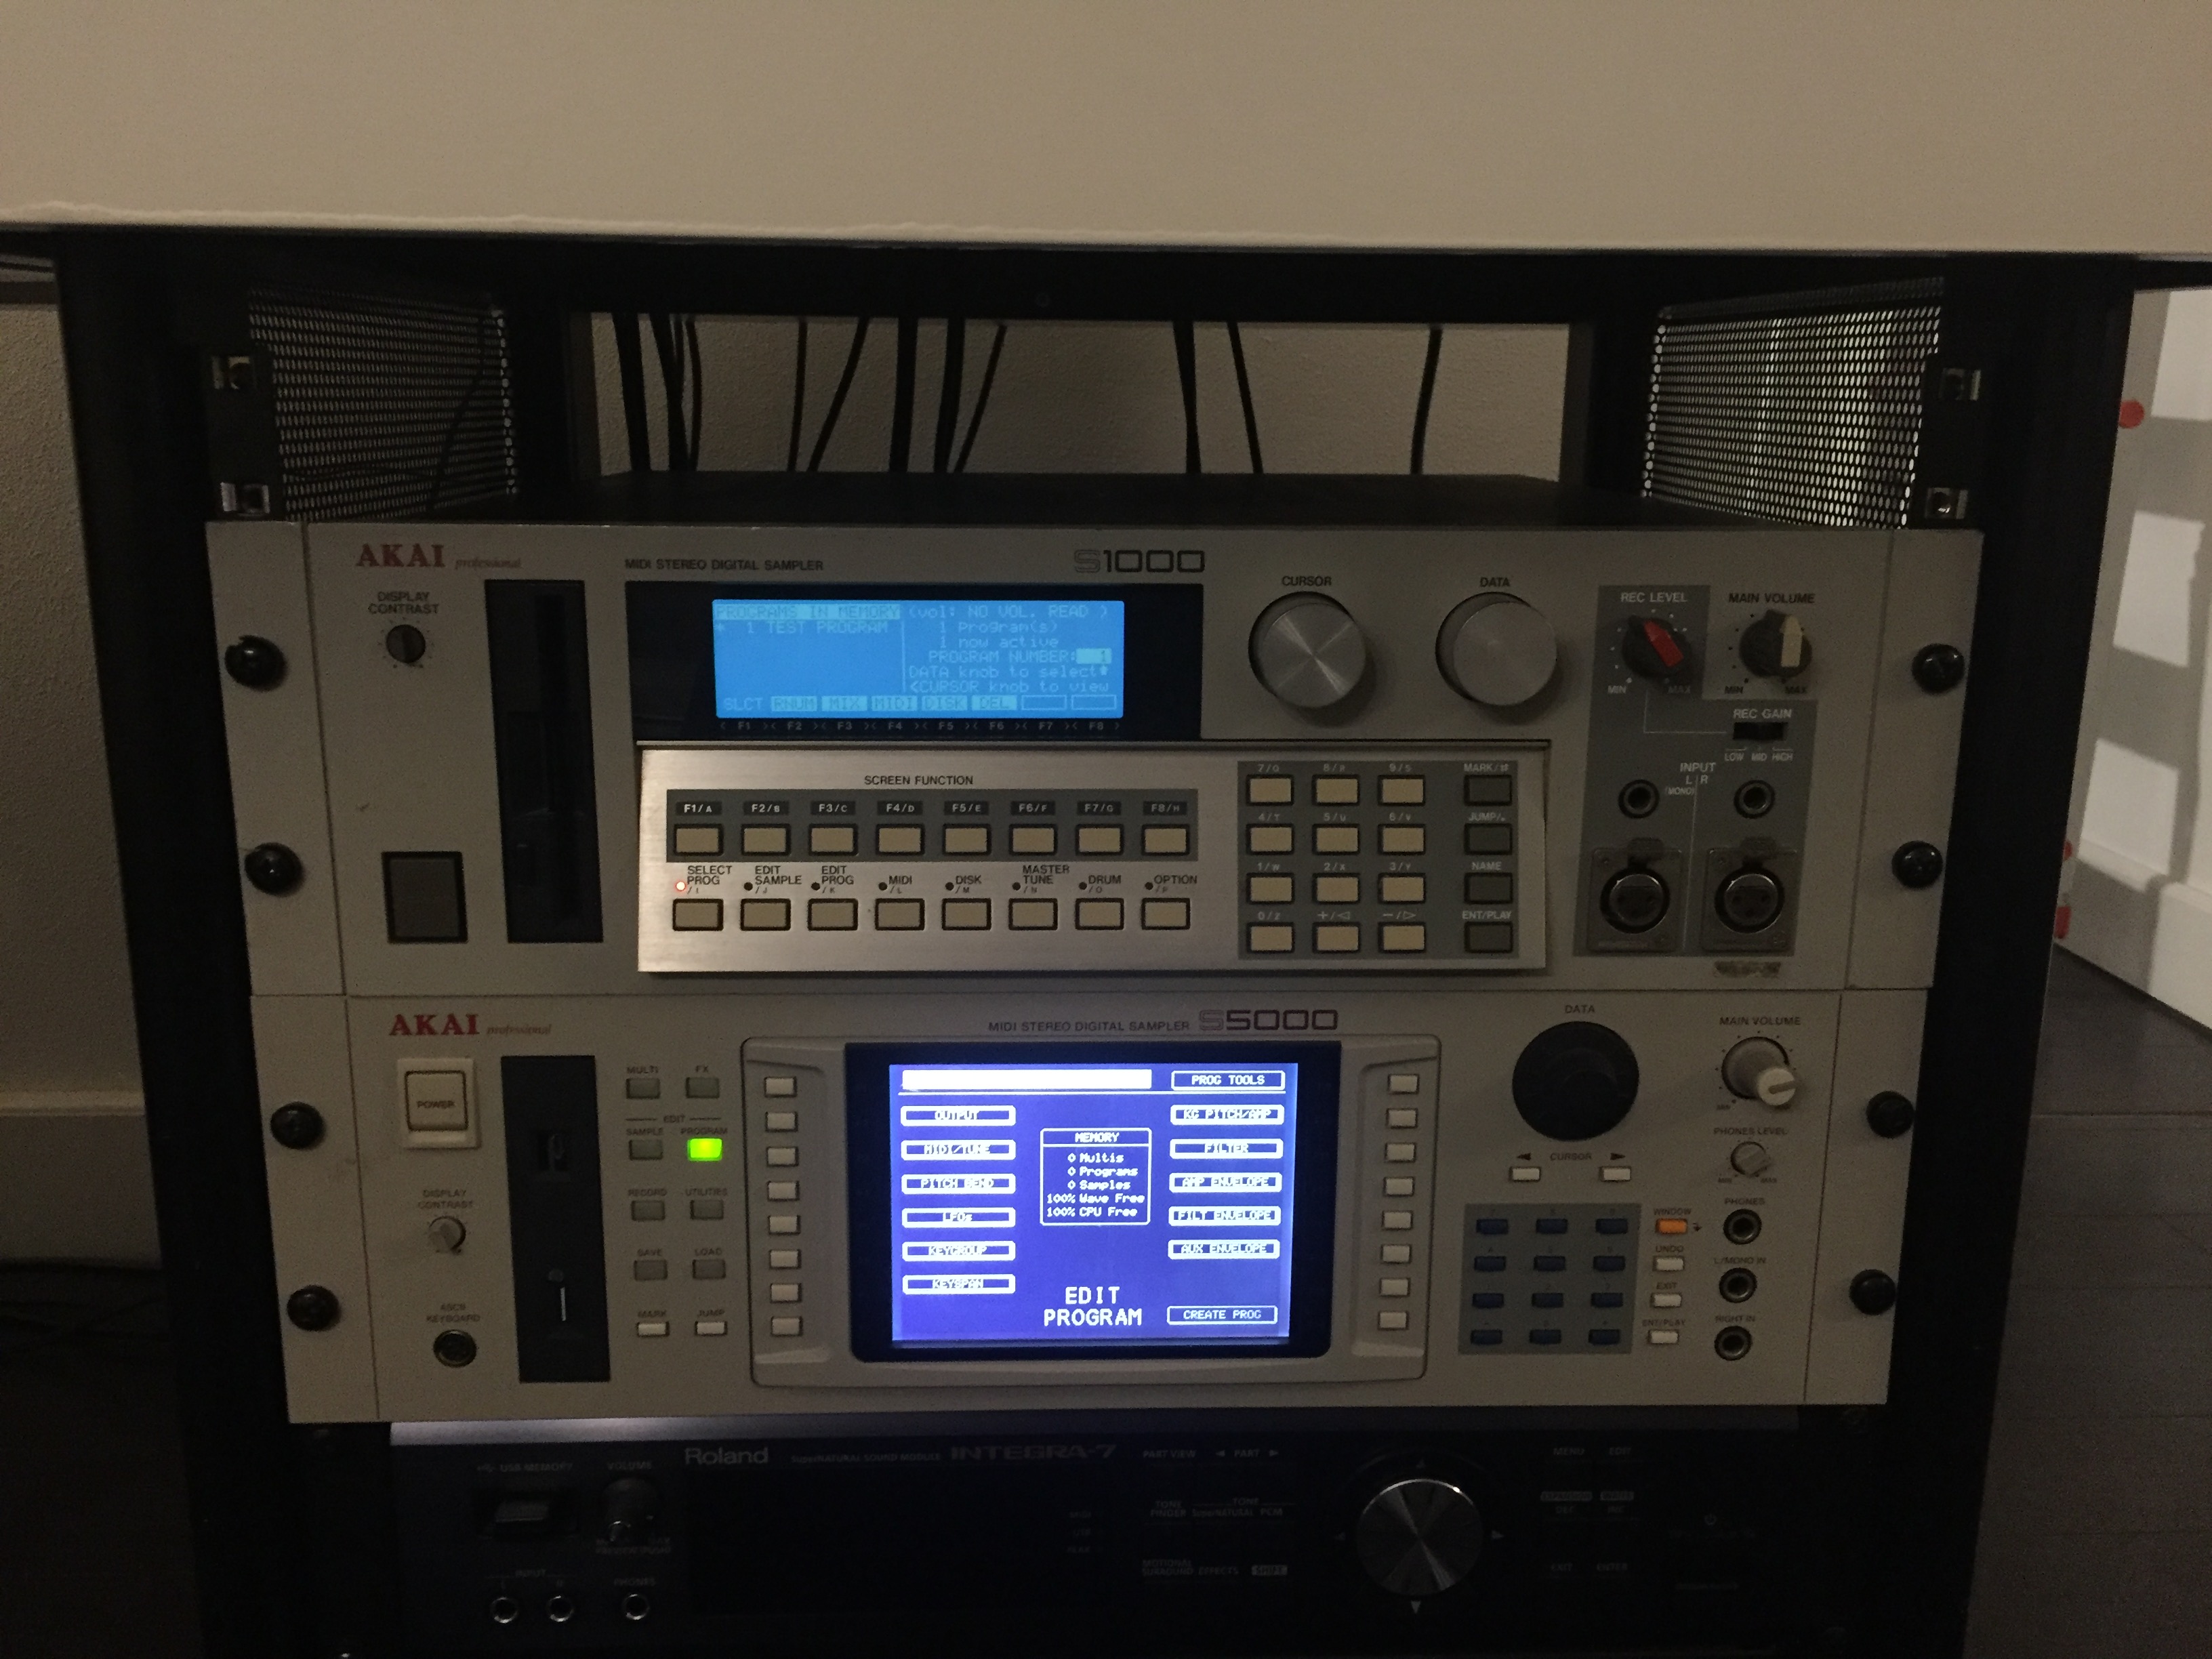
After the case swap and some final testing, it was time to join the S1000 with his younger S5000 brother 🙂


Firewall upgrade

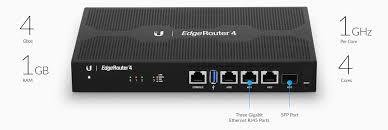
I have been running a Ubiquiti Edgemax ERL-3 firewall for quite some time now and although it’s a good device, it does have its limits. So when Ubiquiti announced the new Edgerouter 4 and Edgerouter 6, I was very much interested.

With double the memory, double the CPU speed, SFP port and a built in power supply unit, life looks good 🙂

The upgrade was also fairly simple. Updated the firmware to the latest 1.10.0, restored the backup configuration of the ERL-3 and I was up and running again in no time. The only thing I had to manually do was to add eth3 as this doesn’t exist on the ERL-3.

Performance is pretty good, the whole interface just feels a bit quicker overall. The ERL-3 was handling the maximum up/download speed fine as well so at some point in time, I might do a quick gigabit test in a lab setup.

Akai S5000 SCSI2SD installation

Couple of weeks ago I bought a used Akai S5000 sampler. It was in full working condition and included a Seagate Barracuda SCSI harddisk as internal storage. Well….I guess I’m a little bit too used to quiet SSD drives these days because ancient SCSI disks are quite loud.

So I searched the internet for alternatives and bumped into the following website:

https://www.codesrc.com/mediawiki/index.php?title=SCSI2SD

A guy from Australia had the same issue and developed a SCSI interface board which uses SD cards to emulate harddisks 🙂 Perfect to get the sampler nice and quite and as OS 2.24 for the Akai also supports FAT32, I can easily transfer files.

Note: There is a V5 and V6 version of the board available. I chose the V5 as it has better compatibility with older equipment.

The next section will explain how to install and use this is combination with an Akai S5000.

Shopping list

  • SCSI2SD interface card (ordered mine from Amigakit in the UK)
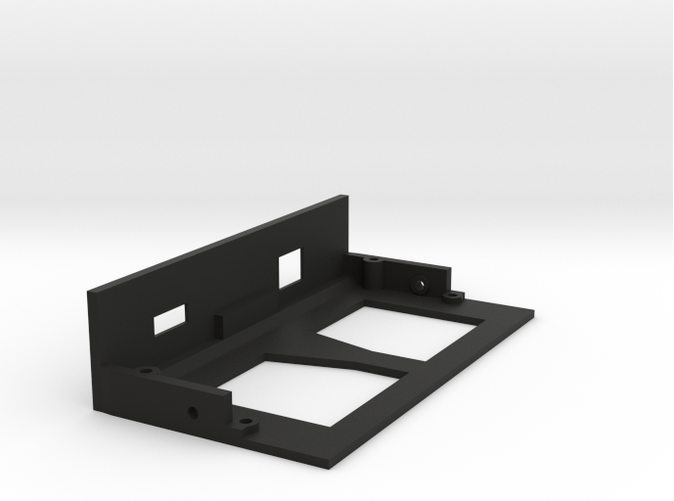
  • Floppy bracket (can be ordered at Shapeways, note: go for black)

  • SCSI-2 50 pin ribbon cable (the original one will be too short to reach the front)
  • Class 10 micro SD card (I’m using a Lexar 300x 64 GB card)

SCSI2SD configuration

  • Start by downloading the configuration software for the SCSI2SD interface. I’m using a Windows laptop for the configuration so check the scsi2sd website for instructions for OSX.
  • Make sure the micro SD card is installed in the slot on the interface
  • Connect a USB cable from your computer to the micro SD connection on the SCSI2SD card
  • Make sure nothing else is connected to the SCSI2SD card!
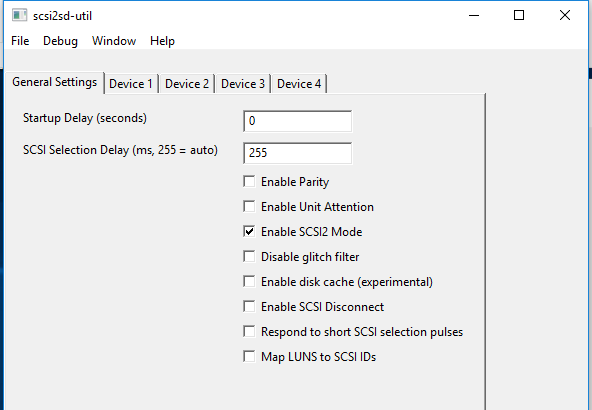
  • Start the scsi2sd-util.exe tool
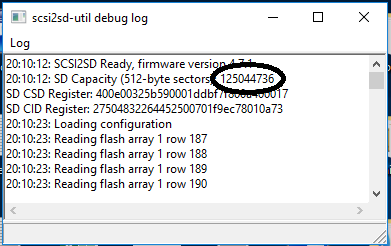
  • Check the log window (hiding behind the main utility window) and mark down the sector size of the SD card

  • Now switch back to the main utility window
  • Under General Settings, select Enable SCSI2 mode

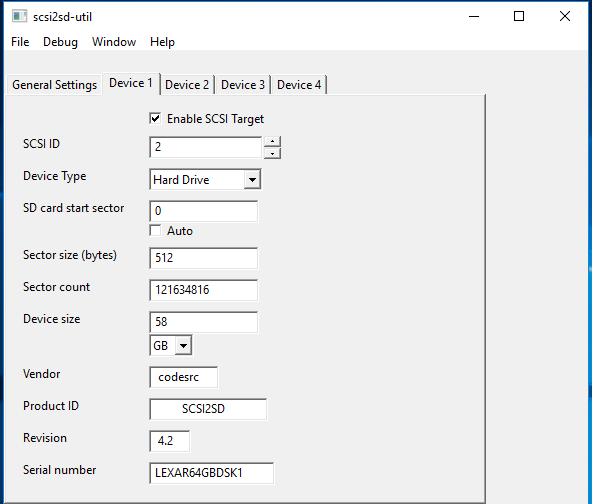
  • Now switch to the tab Device 1
  • Enter a SCSI ID under Enable SCSI target. Any number between 0 and 5 should be fine. Do NOT use 6 as it is reserved for the Akai SCSI controller.
  • Device Type, make sure to select Hard Drive
  • Sector count, fill in the number you marked down earlier decreased by 1 (so 1 sector less)
  • Click Save to device at the bottom.

  • Wait until the utility has saved all the data to the SCSI2SD card
  • Disconnect the USB cable


Installation

  • Disconnect the power cable of the sampler
  • Open up the top cover by removing the 4 top screws and the screw at the back
  • Remove the hard disk (if any is installed) and the floppy disk
  • Replace the current SCSI cable with the new longer cable. Pay special attention to keep the red marked side with pin 1 on the connectors.
  • Install the SCSI2SD card into the new floppy bracket with 2 screws.
    • Note1: There is no need to connect power to the SCSI2SD card as it is powered through the SCSI cable.
    • Note2: Leave the SCSI terminator banks in place on the SCSI2SD card
  • Connect the SCSI cable to the SCSI2SD card
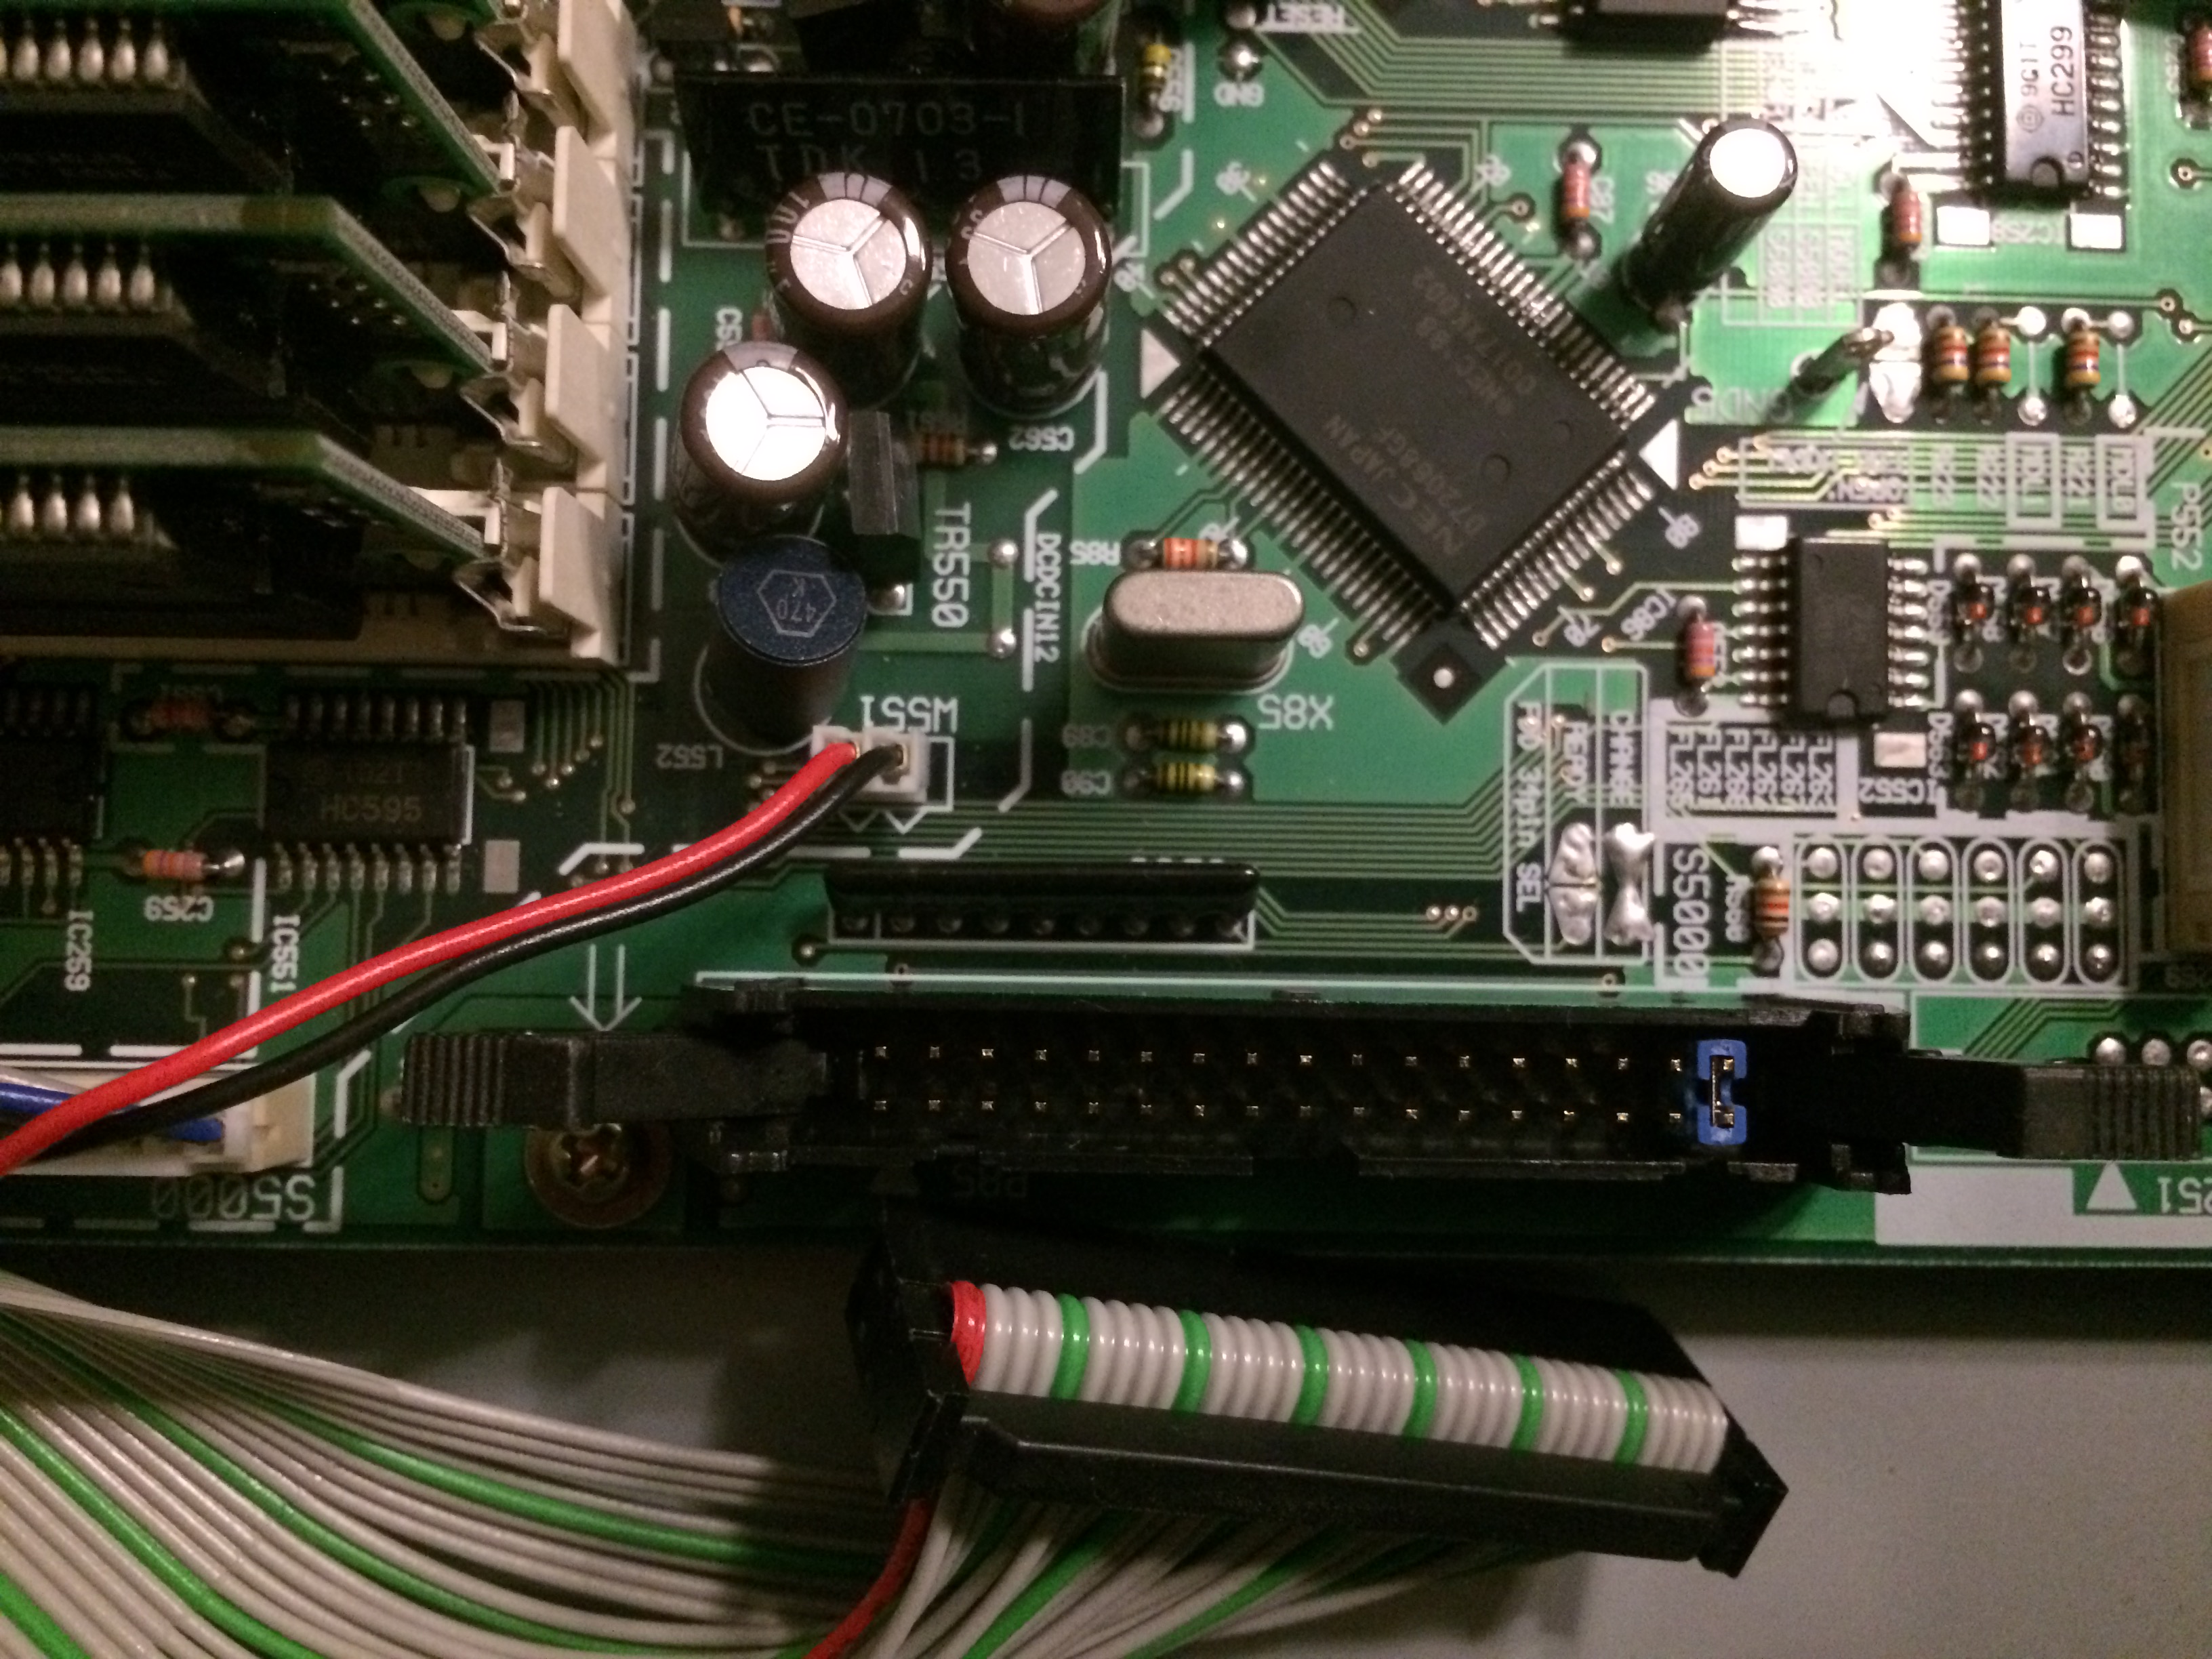
  • Remove the floppydisk cable and place a jumper on pin 33 and 34 (see picture below). This will fake the S5000 by telling it there is still a floppydisk installed. Otherwise when you start a format, it will hang at the end when it automatically checks the state of the floppydisk.

  • Check for any possible short circuits and proper cable connections
  • Close the top lid and reinsert all screws again

Akai setup

  • Power up the Akai
  • Press UTILITIES – DISK TOOLS – DISK LIST
  • Select the hard disk
  • Press FORMAT DISK
  • Choose either QUICK or FULL FORMAT (choose FULL if you have issues with the SD card)
  • Press PROCEED
  • Enter a name for the hard disk
  • Press YES
  • Wait until the format has finished

Additional notes

Do not use your computer to format the SD card as the partition will most likely not align properly with the disk defined in the SCSI2SD card. As a rule of thumb, it’s always good to always format media on the device you intend to use it on.

When I first setup the card, the format actually got stuck at the end and never finished. After some experimentation, I found that disks below 2 GB worked fine (these will be formatted as DOS and not FAT32). When I added a second disk in the SCSI2SD configuration, it formatted fine with FAT32. This behaviour puzzled me a bit and after some further research, I found out it was caused by the fact that the Akai OS actually checks the floppy disk after the hard disk format finishes. The easy fix for this is to install a jumper on pins 33 and 34 of the floppydisk connector on the mainboard as to emulate a “drive ready” signal for the OS.

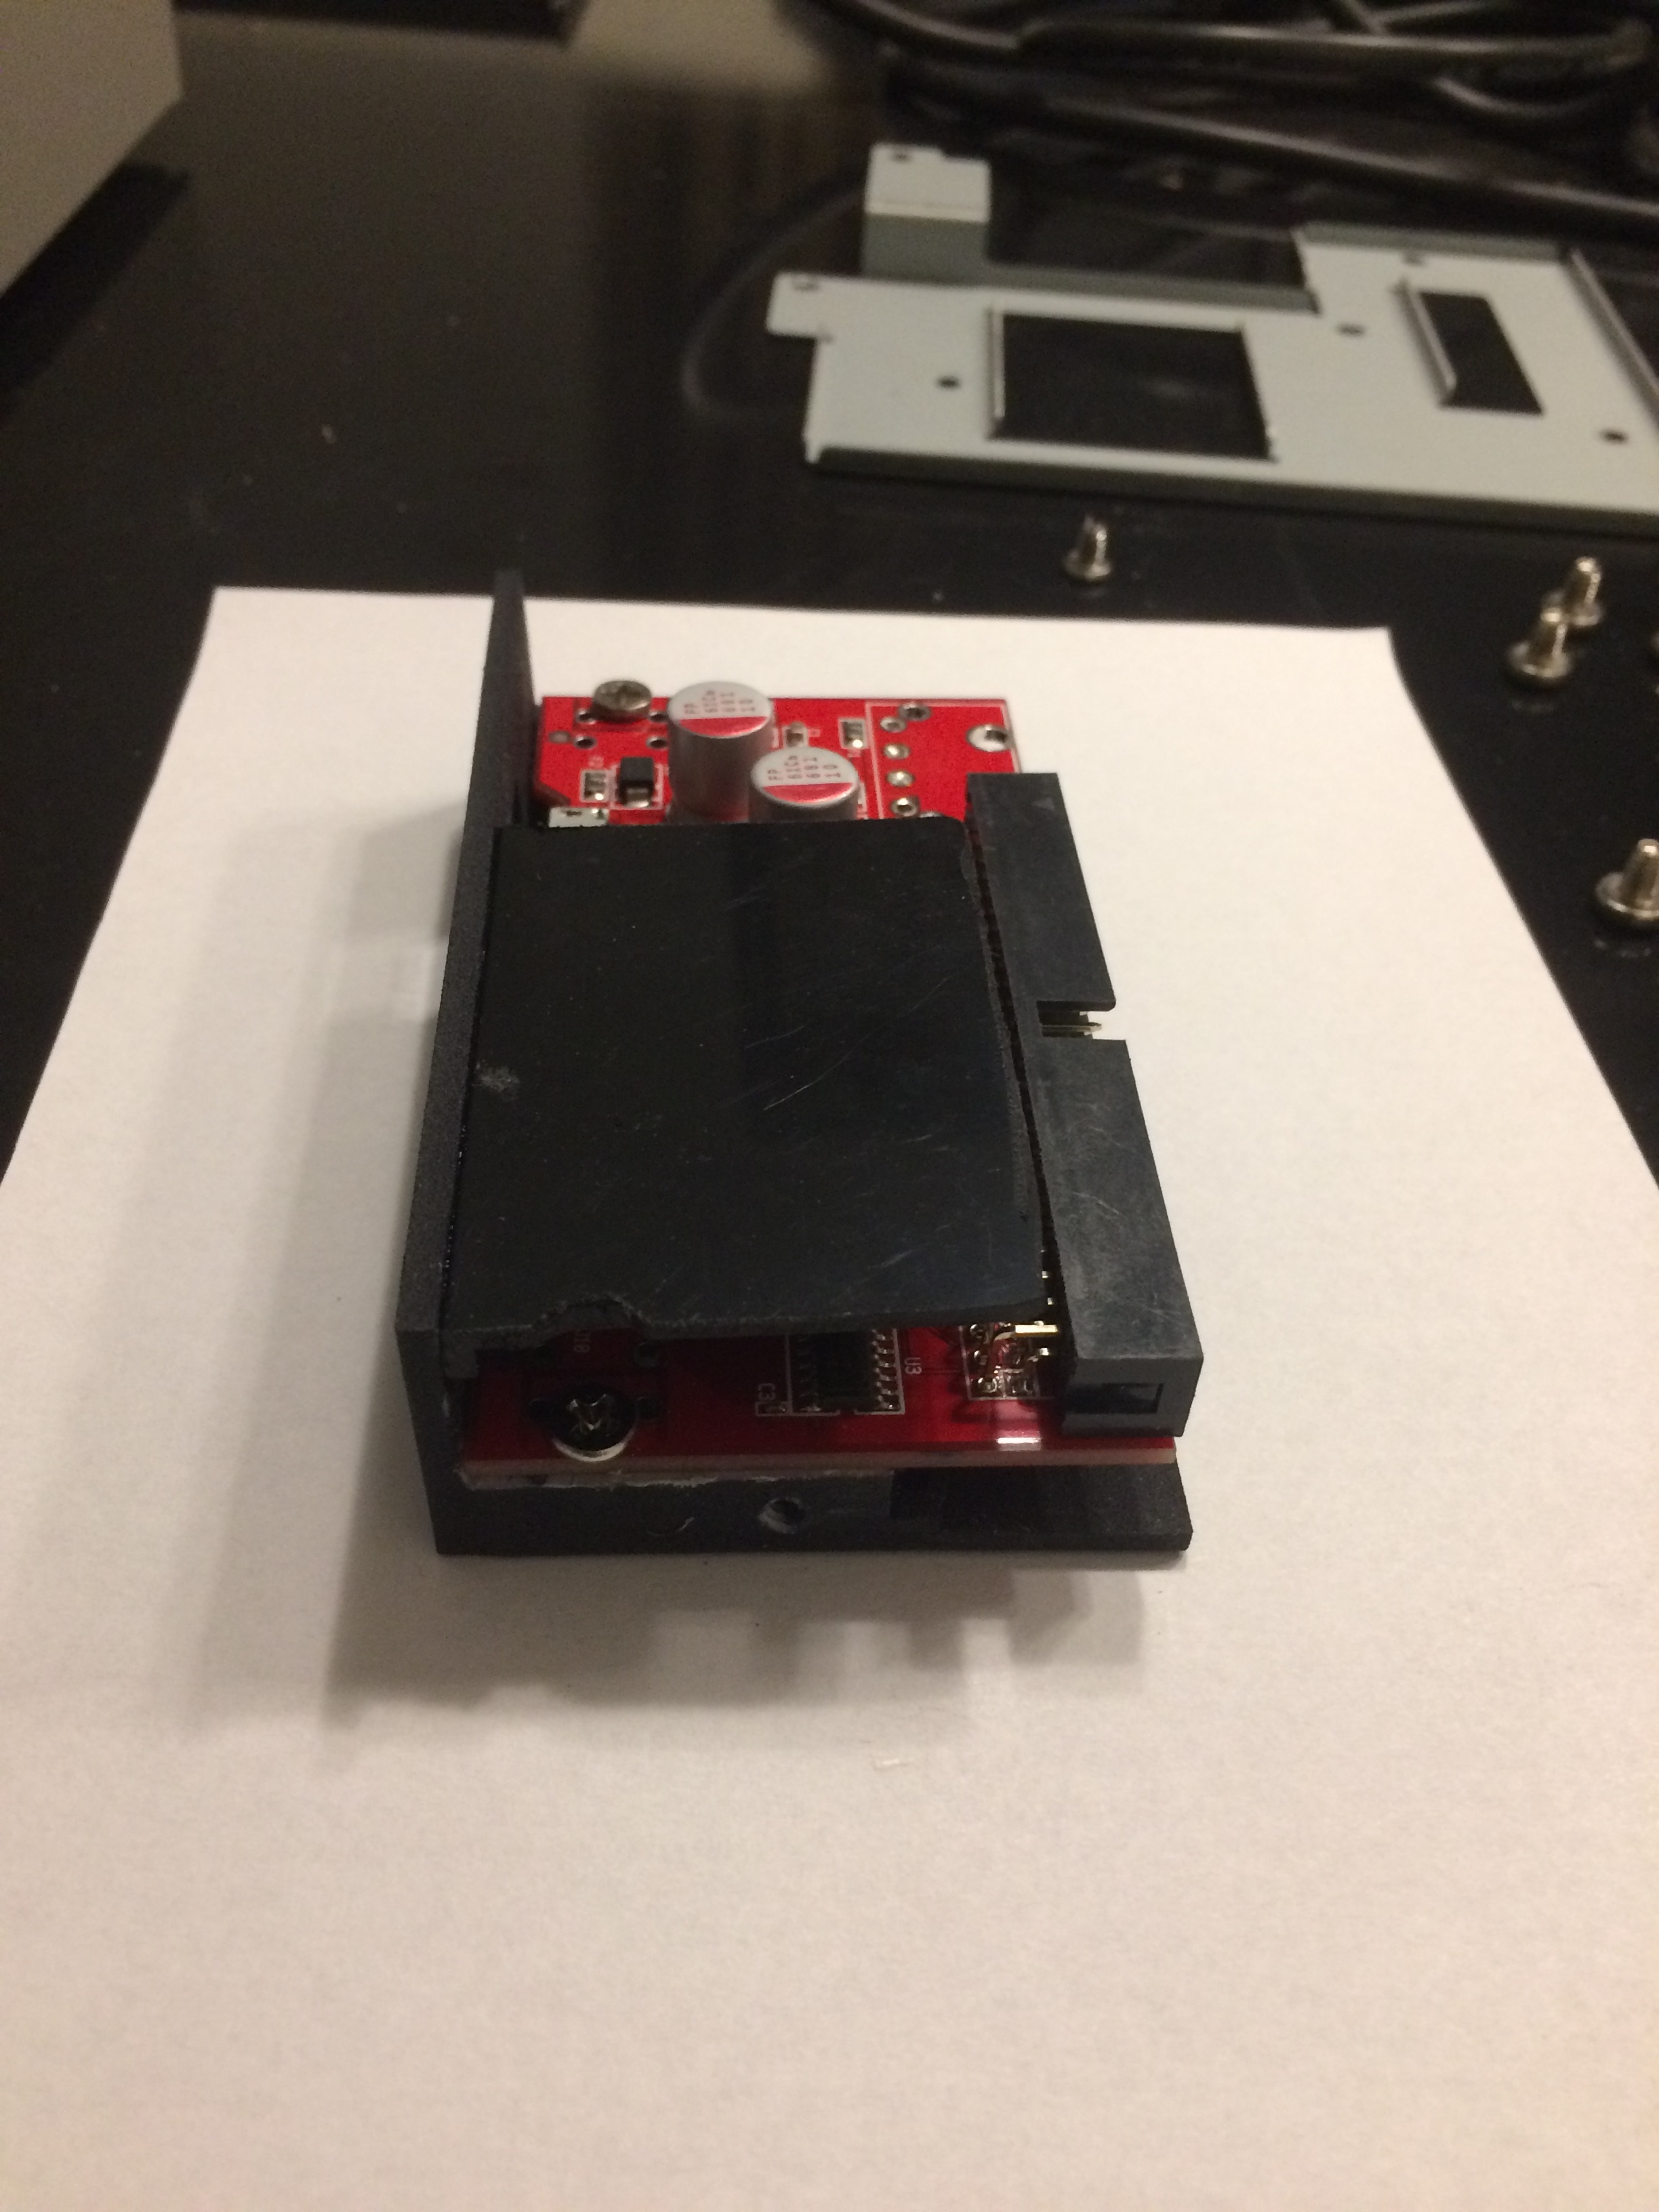
Second issue I bumped into, is that the yellow activity LED on the SCSI2SD card is quite bright and lights up the keys to the right of the floppy drive on the front panel of the sampler. I fixed this by gluing a piece of plastic on top of the floppy bracket to shield the light (see picture below). I even went a step further and installed a light guide from an old TP link adapter to show the LED activity on the front of the floppy bracket.


Deepmind 12 – tuning check

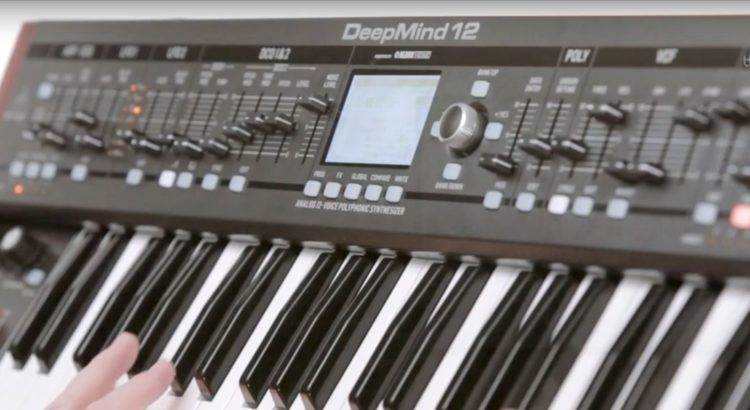
A quick test to see if your filters are correctly tuned :

Call the default program (Prog + Compare)

Turn the DCO1 Saw and Square off.

Set the VCF Freq on 5

Set the VCF Res all way up (10)

Set the VCF KYBD all way up (10) too.

Now press 12 times on a key to hear each voice.

If The sound is the same you’re good.

Else go into Global / System Settings /Calibrate

Choose Calibrate Voices / Call VCF Fine (It’s a fast one)

When it’s finished, press Prog button and retry same Key 12 times –> it should be good now

New webserver

nuc-kit-d34010wyb-front-16480-2x1.jpg.rendition.cq5dam.webintel.310.155

Having run my website on a Raspberry Pi for a while was a good experiment in low power consumption (9 watt) and a good improvement of the virtual machine I was running on an HP workstation ( 180 watt). However, the disk performance of a Pi is not that great (USB performance is actually better than the SD card) so I had already been looking for a good balance between performance and power usage.

After some searching, I’m now the proud owner of an Intel NUC (D34010WYB) with Intel I3 processor, 8 GB memory and an 128 GB SSD disk. Average power consumption is about 50 watt which is good enough for daily use.

Raspberry disk speed: Read 21,7 MB/s, write 12,4 MB/s
Intel NUC disk speed: Read 4,4 GB/s, write 1,3 GB/s (gotta love those SSD speeds 🙂 )

I have installed the system with Ubuntu 16, PHP 7 and Nginx (basic LEMP server) and performance is quite good 🙂